Cloning your laptop’s SSD is one of the fastest and easiest ways to upgrade to a larger or faster drive without losing any programs, files, or settings. Unlike a fresh Windows installation, cloning preserves everything exactly as it is—including your Windows license activation, installed software, and customisations.
In this guide, we’ll walk through everything you need to know: what hardware you’ll need, four different cloning methods (free and paid options), step-by-step instructions, and solutions to common problems. Whether you’re upgrading from a 256GB SSD to 1TB or migrating from a slow 2.5″ SATA drive to a fast M.2 NVMe SSD, this guide covers all the scenarios.
What You’ll Need to Clone Your Laptop SSD
Before you start, gather these essentials:
- New SSD — Must be the same form factor as your existing drive (M.2, 2.5″, or mSATA). Size must be equal to or larger than your current drive. Example: if your current drive is 256GB and 70% full, a 512GB replacement works fine. A 256GB replacement does not.
- USB enclosure or adapter — Connects your new SSD to your laptop via USB so the cloning software can see both drives simultaneously. See the section below for specific recommendations.
- Cloning software — Free or paid. We’ll cover four proven options.
- USB-C or USB-A cable — Included with most enclosures, but check.
- Screwdriver — Torx T5 or Phillips, depending on your laptop. Usually included in a basic toolkit.
Important: Before starting, back up your data to an external drive or cloud storage. Cloning is safe, but backups give you peace of mind.
Best USB Enclosures for Cloning Your Laptop SSD
You’ll need a USB enclosure to connect your new SSD to your laptop during cloning. Choose based on your drive type:
For M.2 NVMe SSDs
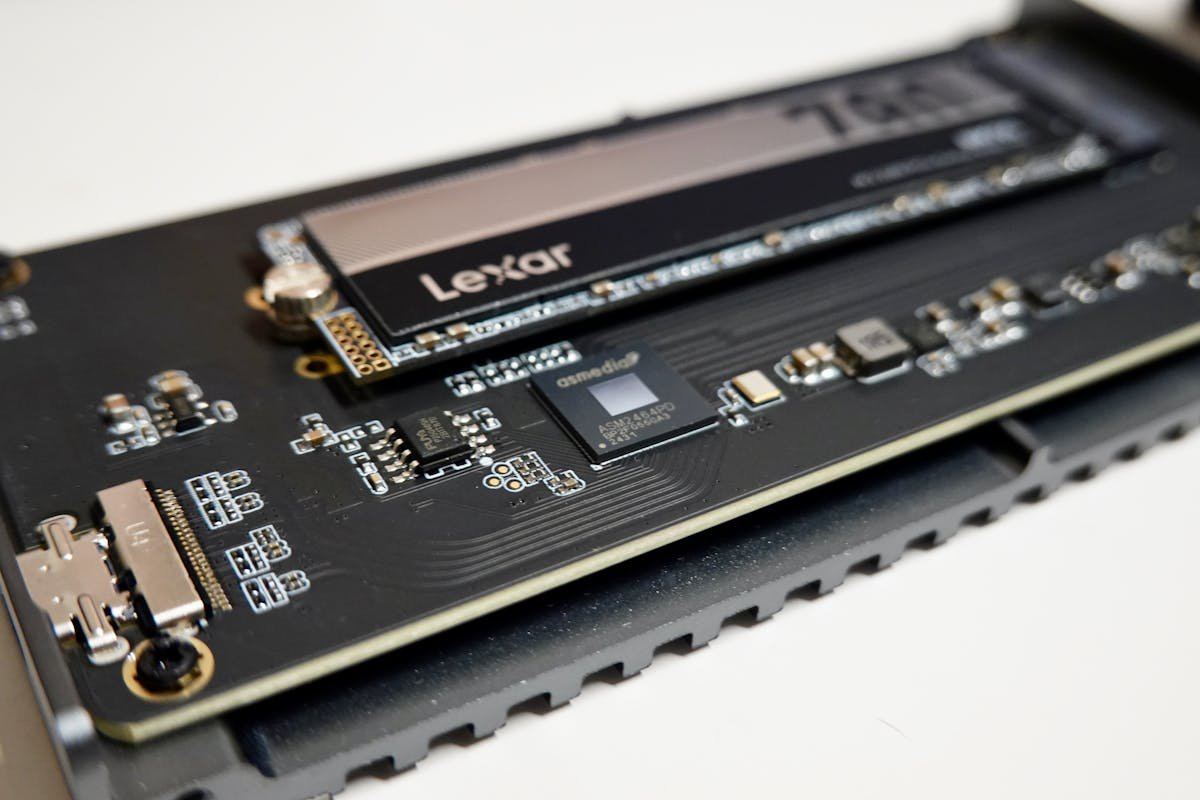
Sabrent Rocket Nano External SSD Enclosure (USB-C) is a popular choice for M.2 NVMe drives. It’s compact, fast, and supports USB 3.1 for rapid data transfer. The USB-C connector is universal and future-proof. Look for models with built-in heat sinks if you plan to use it for sustained cloning (2+ hours).
Browse M.2 NVMe USB-C Enclosures on Amazon
Alternative: UGREEN M.2 NVMe SSD Enclosure offers excellent value and includes both USB-C and USB-A adapters, making it compatible with older laptops.
For 2.5″ SATA SSDs
Sabrent USB 3.0 to SATA Hard Drive Enclosure works with any 2.5″ SSD or HDD. It’s simple, reliable, and inexpensive. SATA drives are older form factors, but some budget laptops still use them. If you’re upgrading from SATA to NVMe, this enclosure lets you clone across different drive types seamlessly.
Browse 2.5″ SATA USB Enclosures on Amazon
Pro tip: Many laptop manufacturers sell official USB enclosures for your specific model. Check your laptop brand’s support page first—official enclosures are often cheaper and perfectly sized.
Method 1: Clone with Macrium Reflect Free
Status (March 2026): Macrium Reflect Free has been discontinued and is no longer available as a free download. However, if you already have it installed, it will continue to work. Macrium Reflect 8 (paid)** offers a 30-day free trial, which is sufficient for a one-time clone.
If you have access to Macrium Reflect (free or trial), follow these steps:
- Download and install Macrium Reflect on your laptop.
- Connect your new SSD to your laptop via the USB enclosure.
- Open Macrium Reflect and select Clone Disk from the home menu.
- Select your current SSD as the source drive.
- Select your new SSD as the destination drive.
- Review the operation summary. Macrium will show you the partition layout and confirm the destination has enough space.
- Click Next and then Finish to start cloning. The process typically takes 20–60 minutes depending on how much data you’re cloning.
- Once complete, shut down your laptop, swap the drives, and power back on.
Advantages: Very user-friendly, handles all partition types, includes disk verification after cloning.
Disadvantages: No longer free (trial required), not available for fresh downloads.
Method 2: Clone with Samsung Data Migration (Free)
If you’re buying a Samsung SSD (860 EVO, 870 EVO, 980 Pro, or any modern Samsung drive), the manufacturer provides Samsung Data Migration software—a free, purpose-built cloning tool.
Steps:
- Purchase your new Samsung SSD and connect it to your laptop via USB enclosure.
- Download Samsung Data Migration from Samsung’s official support website (no account required for most drives).
- Install the software and launch it.
- The software automatically detects your current drive and the new Samsung drive.
- Select your current drive as the source and the new Samsung drive as the destination.
- Click Start. The cloning process begins immediately. You’ll see a progress bar showing percentage complete and time remaining.
- Once done, shut down, physically swap the drives, and restart.
Advantages: Completely free, optimised for Samsung drives, simple one-button operation, excellent customer support.
Disadvantages: Only works if your new drive is a Samsung SSD. Does not support cloning to non-Samsung drives.
Find Samsung SSDs on Samsung UK
Method 3: Clone with Clonezilla (Free, Open-Source)
Clonezilla is a free, open-source disk cloning tool that works with any brand of SSD. It’s more technical than point-and-click tools, but still very manageable. Clonezilla is particularly useful if you’re upgrading from an older Windows 7/8 system or cloning across very different hardware.
Steps:
- Download Clonezilla from clonezilla.org (choose the “Stable Release” ISO image for your system).
- Burn the ISO to a USB drive using a tool like Rufus (Windows) or Etcher (Mac/Linux). Browse USB drives on Amazon
- Connect your new SSD via USB enclosure and your Clonezilla USB drive to your laptop.
- Boot from the Clonezilla USB (press F12, F2, or Del during startup to open the boot menu, depending on your laptop).
- At the Clonezilla menu, select Start_Clonezilla.
- Choose device-device (disk to disk cloning).
- Select beginner mode.
- Select your current drive (source) and new drive (destination). Clonezilla will list them by size and model—double-check you have them the right way around.
- Review the summary and confirm. Clonezilla will begin cloning. Watch the progress bar—do not power off or unplug devices.
- Once complete, power down, remove the Clonezilla USB, swap the drives, and restart.
Advantages: Completely free, works with any brand of SSD, very reliable, does not require Windows to be running.
Disadvantages: Command-line interface (though menu-driven), requires creating a bootable USB, slightly steeper learning curve than GUI tools.
Clonezilla is ideal if: You’re on a tight budget, cloning an older or unusual system, or want maximum control over the cloning process.
Method 4: Fresh Install Instead (When Cloning Isn’t Ideal)
Sometimes cloning isn’t the best option. Consider a fresh Windows install if:
- Your current Windows installation is cluttered with bloatware or old software you don’t use.
- You’re getting frequent errors or driver conflicts.
- You’re upgrading to a significantly newer laptop or motherboard (cloned Windows may have driver issues).
- You want a clean slate with no legacy files or settings.
Fresh Install Steps:
- Back up all your important files to cloud storage or an external drive.
- Download the Windows 11 ISO from Microsoft’s official site.
- Create a bootable Windows USB using the Windows Media Creation Tool (available on Microsoft’s site).
- Install your new SSD in your laptop (see the physical installation section below).
- Boot from the Windows USB and follow the on-screen installation wizard. Choose Custom Install and select your new SSD as the destination.
- Once Windows is installed, reinstall your applications from their original installers or the Microsoft Store. This typically takes 1–3 hours depending on software count.
- Restore your backed-up files from cloud storage.
- Reactivate Windows using your existing product key (linked to your Microsoft account) or your laptop’s OEM key (automatically detected).
Advantages: Clean system, no bloatware, guaranteed driver compatibility, faster performance.
Disadvantages: Time-consuming (3–6 hours total), requires reinstalling software, may lose application settings and preferences.
Step-by-Step Physical Installation
Once you’ve cloned your drive (or downloaded a fresh Windows ISO), you’ll need to physically swap the old SSD for the new one. Here’s how:
Preparation
- Power off your laptop completely.
- Unplug the power adapter and wait 30 seconds for any residual charge to dissipate.
- Ground yourself by touching a metal part of the laptop frame or wearing an anti-static wrist strap (optional but recommended).
Opening the Laptop
- Flip your laptop over and locate the access panel (usually marked “HDD” or “SSD”). Check your laptop’s service manual for exact location.
- Remove the screws holding the panel (usually 2–4 Torx or Phillips screws). Keep them in a small container so you don’t lose them.
- Gently peel back the panel and set it aside.
Removing the Old Drive
- Locate your current SSD. It’s typically a slim, rectangular stick inserted at an angle (for M.2) or flat (for 2.5″ SATA).
- For M.2 drives: Gently push down on the drive at a 45-degree angle until you hear a small click. The drive will pivot up. Grasp it and carefully pull it straight out.
- For 2.5″ SATA drives: Unplug the SATA cable from the back of the drive, then unscrew the 2–4 screws holding the drive bracket. Slide the drive out of the bracket.
- Set the old drive aside in a safe, static-free place (in an anti-static bag if available). You may want to keep it as a backup or external storage later.
Installing the New Drive
- For M.2 drives: Hold the new SSD at a 45-degree angle and gently insert it into the M.2 slot. You’ll feel slight resistance. Push down gently until the drive is flush, then you’ll hear another small click as it locks into place.
- For 2.5″ SATA drives: Slide the new drive into the bracket, secure with 2–4 screws, and plug the SATA cable into the back of the drive.
- Do not force the drive—if it doesn’t slide in smoothly, check the angle or orientation and try again.
Closing the Laptop
- Replace the access panel and secure with the screws you removed earlier. Tighten firmly but do not over-tighten (you should not need excessive force).
- Flip the laptop back over and reconnect the power adapter.
First Power-On
- Power on the laptop. If you cloned the drive, Windows should start normally within 30–60 seconds. If you did a fresh install, the Windows setup wizard will appear.
- If nothing happens or you see a “No bootable device” error, see the troubleshooting section below.
After Cloning: Verify Everything Works
Once your laptop boots from the new SSD, take these steps to confirm the clone was successful:
Check Disk Capacity
Open File Explorer (Windows) and check the C: drive properties. You should see the new drive’s capacity listed. For example, if you upgraded from 256GB to 512GB, you’ll now see 512GB available (minus the space used by Windows and your files).
Note: If you cloned to a larger drive, Windows won’t automatically use the extra space. You’ll need to expand the C: partition manually (see the troubleshooting section).
Verify Your Files and Programs
Check that all your files are present in their original locations (Documents, Desktop, Downloads, etc.). Open one of your installed programs to confirm it runs without errors.
Check Windows Activation
Right-click the Start button, select Settings, then navigate to System > About. Look for “Windows is activated.” If it says “Activated,” your licence transferred correctly. If it says “Unlicensed,” see the troubleshooting section below.
Update Drivers (If Needed)
Open Device Manager (right-click Start > Device Manager) and look for any devices with yellow warning triangles or “Unknown Device” entries. If you see any, right-click and select Update driver. Windows will search for the latest drivers automatically.
If Device Manager looks clean (no warnings), your clone was successful and driver-compatible.
Run a Disk Health Check
For additional peace of mind, download a free SSD health tool like CrystalDiskInfo or Hard Disk Sentinel to check the SMART health status of your new drive. A “Good” or “Healthy” status means the clone was successful and your drive is functioning normally.
Browse external SSDs on Amazon for backups
Common Cloning Problems and Solutions
Problem 1: Destination Drive Is Too Small
Error message: “The destination disc is too small” or “Insufficient space on destination drive.”
Cause: Your new SSD is smaller than the total space used on your old drive (including partitions and system reserves).
Solution: You have two options: (1) Buy a larger SSD that exceeds your current drive’s total capacity, or (2) Delete large files or unused programs from your old drive before cloning to reduce the used space. Most cloning software allows you to clone partitions selectively rather than the entire disk.
Problem 2: “GPT vs MBR” Partition Table Mismatch
Error message: “GPT/MBR mismatch” or “Cannot clone to a GPT partition table.”
Cause: Modern systems use GPT (GUID Partition Table), but older Windows 7/8 systems use MBR (Master Boot Record). Your cloning software might not support converting between them automatically.
Solution: (1) Use Clonezilla, which handles GPT ↔ MBR conversion automatically, or (2) Use the Windows command-line tool MBR2GPT to convert your old drive to GPT before cloning.
Problem 3: BitLocker Encryption Blocks Cloning
Error message: “Cannot access encrypted drive” or “BitLocker is enabled.”
Cause: Your laptop has BitLocker drive encryption enabled, which some cloning tools cannot read while Windows is running.
Solution: (1) Disable BitLocker before cloning: Open Control Panel > BitLocker Drive Encryption and select Turn off BitLocker (this takes 10–20 minutes). Then clone. Re-enable BitLocker afterward. Or (2) Use Macrium Reflect or Clonezilla, which can clone encrypted drives without disabling BitLocker first.
Problem 4: Cloned Drive Won’t Boot (“No Bootable Device”)
Error message: “No bootable device found” or “Boot failed” on startup.
Cause: The cloning software may not have copied the boot partition, or the boot order in your BIOS is incorrect.
Solution: (1) Check your BIOS boot order. Restart the laptop and press F2, F12, or Del during startup to enter BIOS Setup. Look for “Boot Order” or “Boot Sequence” and ensure your new SSD is listed first. Save and exit. Or (2) Verify the clone completed without errors. If it failed partway through, reclone using a different tool or method.
Problem 5: Windows Won’t Activate After Clone
Error message: “Windows is not activated” or “Your licence is about to expire.”
Cause: Your Windows licence is tied to specific hardware (motherboard/BIOS). Cloning to a significantly different system (e.g., different laptop model, major hardware change) can trigger reactivation requirements.
Solution: (1) Sign in with your Microsoft account and navigate to Settings > System > About > Troubleshoot. Click Activate and follow the prompts—Windows will reactivate automatically if the licence is valid. Or (2) If you have a physical licence key or product key, enter it in the same Settings menu. If neither works, contact Microsoft Support or your laptop’s OEM (Dell, HP, Lenovo, etc.).
Problem 6: Partition Alignment Issues (Slow Performance)
Symptom: The clone works, but the new SSD feels slower than expected.
Cause: Partition alignment—a technical issue where partitions don’t align to physical SSD blocks, causing slower read/write performance.
Solution: Most modern cloning tools (Macrium Reflect, Clonezilla, Samsung Data Migration) automatically align partitions correctly. If you suspect misalignment, run a speed test using CrystalDiskInfo or AS SSD Benchmark (free). Compare results to your drive’s specification sheet. If speeds are significantly slower, reclone using Clonezilla, which explicitly optimises alignment for SSDs.
Problem 7: Extra Space on New Drive Not Usable
Symptom: You upgraded from 256GB to 512GB, but File Explorer only shows ~256GB usable.
Cause: The cloning software copied the old partition table exactly, which reserves the old drive’s capacity. The extra 256GB is unallocated and invisible to Windows.
Solution: Expand the C: partition to use the new space: (1) Right-click Start and open Disk Management. (2) Locate your C: partition (usually labeled “System” or “Local Disk”). (3) Right-click it and select Extend Volume. (4) Follow the wizard and allocate the maximum space. Windows will reboot and apply the change.
Cloning from 2.5″ SATA to M.2 NVMe: Will It Work?
Yes. Cloning from a slower 2.5″ SATA SSD to a faster M.2 NVMe drive works flawlessly with any modern cloning tool. The file system and partition structure are identical—the only difference is the physical interface and speed.
Expected performance boost: SATA tops out at ~550 MB/s. NVMe drives typically reach 3,500–7,000 MB/s (depending on Gen 3 vs Gen 4). In real-world usage, you’ll notice: faster boot times (10–15 seconds vs 30–45), quicker application launches, and snappier file transfers.
No additional steps needed. Your cloning software will handle the conversion automatically. Just ensure your laptop has an available M.2 slot (most modern laptops do, but older models may not). Check your laptop’s service manual or try searching “[Your Laptop Model] M.2 upgrade” online.
Browse M.2 NVMe SSDs on Amazon
Frequently Asked Questions
Q: How long does cloning take?
A: Typical cloning time is 20–120 minutes, depending on how much data is on your drive. A 256GB drive that’s 50% full (128GB used) usually takes 30–45 minutes with a USB 3.0 connection. USB 3.1 can be 10–20% faster. Monitor the software’s progress bar—do not interrupt the process.
Q: Can I use my laptop while cloning?
A: No. Close all programs and do not interact with your laptop during cloning. Even background activity (Windows Update, antivirus scans) can corrupt the clone. If you see warnings about running processes, close them and restart the cloning process.
Q: Will my Windows licence transfer to the new SSD?
A: Yes, if you’re cloning. The cloned drive includes your Windows licence information. Activation should be automatic on first boot. If you do a fresh Windows install, your OEM licence (pre-installed on your laptop) will activate automatically. Retail licences require you to sign in with a Microsoft account.
Q: What should I do with the old SSD after cloning?
A: You have several options: (1) Keep it as a backup in a USB enclosure for external storage. (2) Use it as a secondary drive in a desktop PC if you have one. (3) Securely wipe and recycle it. (4) Sell it online (if capacity and condition permit). Important: Use secure wiping software (like Eraser or manufacturer tools) to remove your data before reselling or recycling—standard deletion is not secure.
Q: Can I clone to an SSD in an external enclosure and then swap it in later?
A: Yes. The process is identical whether the new SSD is in an enclosure (connected via USB) or installed inside your laptop. Once cloning is complete, power down, physically install the SSD into your laptop (as described above), and power back on. Windows will boot normally.
Q: Is cloning faster than fresh installing Windows?
A: Yes. Cloning typically takes 30–90 minutes total (including physical installation). A fresh install requires downloading Windows, burning it to USB, installing, and then reinstalling all your software—typically 3–6 hours or more. If you’re happy with your current system setup, cloning saves hours.
Recommended Products
These are the products we recommend based on this guide. All links go to Amazon where you can check current prices and availability.
| Product | Why We Recommend It | Amazon |
|---|---|---|
| Corsair Vengeance DDR4 SO-DIMM 32GB (2×16GB) 3200MHz | Best overall DDR4 upgrade kit | View on Amazon |
| Kingston Fury Impact DDR4 SO-DIMM 32GB (2×16GB) 3200MHz | Reliable alternative with tight latency | View on Amazon |
| Crucial DDR4 SO-DIMM 16GB 3200MHz | Budget single-stick upgrade | View on Amazon |
| Samsung DDR4 SO-DIMM 32GB 3200MHz | OEM-quality for business laptops | View on Amazon |
| Samsung 990 Pro 2TB NVMe M.2 2280 | Fastest consumer NVMe — ideal for gaming & editing | View on Amazon |
| WD Black SN850X 2TB NVMe | Excellent Gen4 speed with heatsink option | View on Amazon |
| Crucial P5 Plus 1TB NVMe | Great value Gen4 SSD | View on Amazon |
| Kingston NV2 1TB NVMe | Budget-friendly with solid reliability | View on Amazon |
Prices and availability may vary. As an Amazon Associate, we earn from qualifying purchases.
Related Guides
- Ssd Compatibility
- Best Laptop Ssds 2026
- How To Check Laptop Ssd Compatibility
- Best 4Tb Laptop Ssd
- Best 2Tb Laptop Ssd
Recommended NVMe SSD Upgrades
As an Amazon Associate we earn from qualifying purchases. Prices & availability shown on Amazon.
How we verify this guide
We cross-reference compatibility figures against manufacturer specifications where available, official service manuals, and the standards that govern fit — memory type and speed (DDR4 / DDR5 / LPDDR5), maximum supported capacity and slot count, SSD form factor and interface (M.2 2280, NVMe PCIe vs SATA, keying), and charger wattage and connector (USB-C Power Delivery, GaN). We’re explicit about soldered or non-upgradeable parts, prioritise primary sources over retailer listings, and re-verify the data on a regular cycle. More on our method →