Installing a solid-state drive (SSD) in your laptop is hands-down the single biggest speed upgrade you can make. Whether your laptop shipped with a slow mechanical hard drive, an ageing SATA SSD, or you simply want to double your storage — swapping in a faster NVMe drive transforms everything. Boot times plummet from minutes to seconds. Applications launch instantly. File transfers feel snappy. And the good news? It’s easier than you might think.
This guide covers both M.2 NVMe SSDs (the modern standard, found in 99% of new laptops) and 2.5″ SATA drives (for older machines). We’ll walk through the tools you need, step-by-step installation, how to clone your existing drive without losing data, and troubleshooting if things don’t go smoothly. No soldering. No firmware flashing. Just a screwdriver and twenty minutes.
New to the compatibility side? Check out our Laptop SSD Compatibility Guide to verify which drive types and capacities your exact model supports.
Before You Start: Identify Your Laptop’s SSD Type
Not all SSDs are created equal — and your laptop can only accept one type. Cramming the wrong drive into the wrong slot won’t work (and could damage both). Spend 60 seconds confirming what your machine uses.
How to Check Your Current Drive
On Windows: Right-click the Start menu, open Device Manager, expand “Drives”. Look for entries like “SAMSUNG 970 EVO” or “Kingston FURY Beast”. Note the model name. Then check the drive’s specifications online — a quick search will tell you if it’s NVMe or SATA, and what M.2 form factor (2280, 2230, etc.).
Alternatively, download CrystalDiskInfo (free, lightweight). It shows drive type, capacity, temperature, and health status in one glance.
On macOS: Click the Apple menu, About This Mac, Storage. You’ll see “SSD” or “Flash Storage”. To confirm the exact interface and form factor, you’ll need to open System Information → Hardware → Storage. For detailed specs, use Disk Utility.
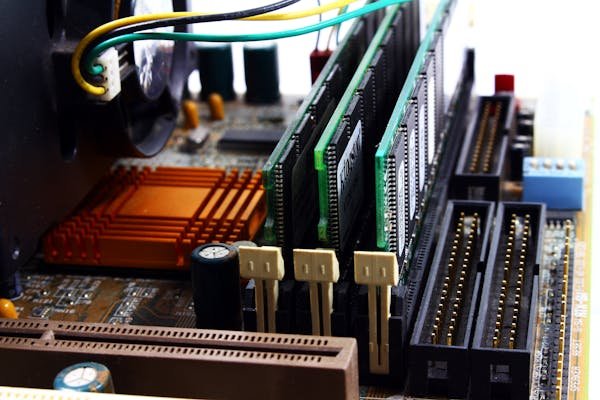
If you’re comfortable opening the laptop: The most direct way is to power down completely, unplug all cables, press the power button 5 times to discharge, then open the bottom panel. Locate the M.2 slot — it’s typically a small rectangular slot near the center of the motherboard, with a metal standoff screw at one end. The drive itself looks like a thin rectangular stick, about the size of a stick of gum. If you see one, you have an M.2 slot. If you see a 2.5″ rectangular bay with SATA cables attached, you have a SATA bay.
The Key Differences
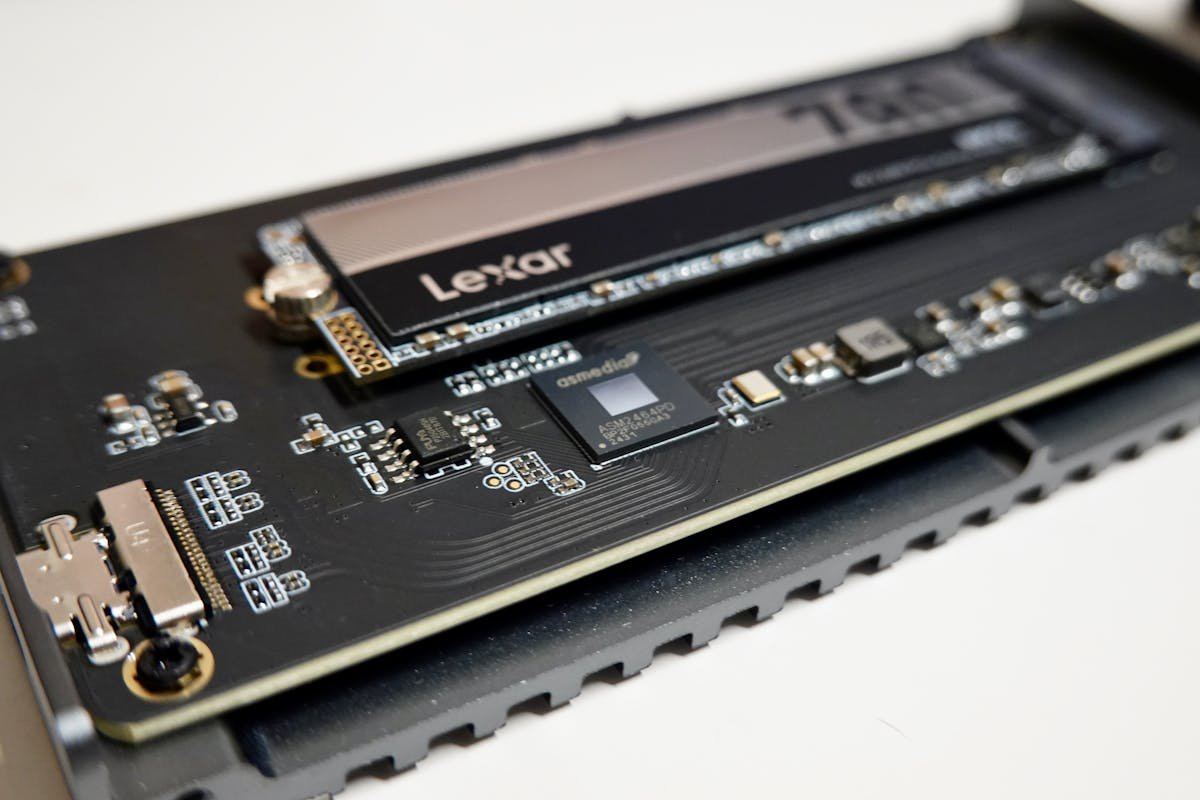
M.2 NVMe: These are the modern standard. They plug directly into an M.2 slot on the motherboard, no cables needed. They’re fast — PCIe Gen 4 drives hit 7,000 MB/s reads, Gen 5 drives exceed 12,000 MB/s. Almost all laptops made since 2018 use this. Form factors: 2280 (most common, about 80mm long), 2230 (ultrabooks and some Surface devices, about 30mm), 2242, 2260. Your laptop almost certainly uses 2280.
M.2 SATA: Rarer now, but some older laptops have an M.2 slot that uses SATA protocol instead of NVMe. These are bottlenecked to SATA speeds (~550 MB/s) but still faster than mechanical drives. Check your current drive’s specifications to be sure.
2.5″ SATA SSD: The older standard. About the size of a thick phone, usually lives in a bay on the bottom of the laptop with a SATA power and data cable. Speeds max out around 550 MB/s. Mostly replaced by NVMe, but still a solid upgrade if your laptop only has a 2.5″ bay.
For detailed compatibility info with your specific laptop model, see our full SSD Compatibility Guide.
Tools You’ll Need
You don’t need much. A basic toolkit takes 10 minutes to assemble if you don’t already have one.
| Item | Why You Need It | Approximate Cost | Amazon Link |
| Phillips Head Screwdriver (M2 or M3) | Laptop screws are tiny. A standard oversized screwdriver will strip them. Get a precision screwdriver set. | £4–8 | Precision Screwdriver Sets |
| Anti-Static Wrist Strap | Optional but recommended. Protects components from static discharge. Clip it to your wrist and touch a metal part of the laptop before handling parts. | £2–5 | Anti-Static Wrist Straps |
| Thermal Pad or Thermal Paste | Some M.2 slots have thermal pads or heat shields. Only needed if your existing drive has one and you need to replace it. | £3–8 | M.2 Thermal Pads |
| Flashlight or Headlamp | Laptop innards are dark. A small torch makes a huge difference. | £3–10 | LED Headlamps |
Step 1: Clone Your Existing Drive (Optional but Highly Recommended)
You have two paths: clone your existing drive to the new one (keeping all your data, apps, Windows licence, recovery partition), or do a fresh Windows install. Cloning takes 15 minutes and saves hours of reconfiguring.
Why Clone?
A fresh install is clean, but you’ll spend the next 3 hours reinstalling apps, reconfiguring settings, and restoring files. Cloning means everything just works — your Windows licence, all your programs, documents, shortcuts, even your wallpaper — all transferred in one go. The only downside is you’ll have duplicate data on both drives briefly (so make sure you have a USB dock or external enclosure to connect the new SSD).
How to Clone
Using Macrium Reflect Free (Windows, recommended): Download Macrium Reflect Free from macrium.com. Install it. Open Macrium, click “Create a backup”, select your current drive as source, and your new SSD (connected via USB) as destination. Click “Next” and let it run. The app copies your entire drive including the boot partition. Takes 20–40 minutes depending on how much data you have and USB speed.
Using Samsung Data Migration (if your new drive is a Samsung): Download the Samsung Data Migration tool from Samsung’s support site. It’s simpler than Macrium but only works with Samsung drives. Same process: source drive, destination drive, hit Go. Only works for Samsung SSDs.
Using Acronis True Image (Windows/Mac, paid but comprehensive): More powerful than the free options, supports more edge cases, but costs £40–50. Only worth it if you’re doing this regularly.
If you don’t have an external enclosure to connect the new SSD, don’t worry — you can skip cloning and do a fresh install instead (see “How to Initialize Your New SSD” below). It takes longer but works fine.
Step-by-Step: Installing an M.2 NVMe SSD
This is the most common install. The whole process takes 10–15 minutes.
Step 1: Power Down and Disconnect Everything
Shut down your laptop completely. Don’t put it to sleep — actually shut it down. Unplug the power cable, any USB devices, headphones, everything. Then press and hold the power button for 5 seconds. This drains residual power from the motherboard and prevents electrical damage to components.
Step 2: Open the Bottom Panel
Flip the laptop over and locate the screws holding the bottom panel on. Most laptops have 4–8 small screws. Some panels pop off after unscrewing; others slide out or are hinged. Check your laptop’s manual if you’re unsure. Use your precision screwdriver to remove all screws. Keep them in a safe place — they’re tiny and easy to lose. Set the bottom panel aside.
Step 3: Locate the M.2 Slot
Look at the exposed motherboard. The M.2 slot is a long, thin rectangular slot, typically near the center or edge of the board. You’ll see a small metal standoff screw at one end. There’s usually a label near it that says “M.2” or “NVME”. Some laptops have a small heatsink or black plastic cover over the slot. If so, unscrew and remove it carefully — there may be thermal tape underneath.
Step 4: Remove the Existing SSD (if Present)
If there’s already a drive in the slot, you’ll need to remove it. Unscrew the small standoff at the end of the drive using your precision screwdriver. Gently pull the drive out at a 30-degree angle toward you. It should slide out smoothly. Don’t force it. Set it aside (you’ll keep this, or donate/sell it, or destroy it if it had sensitive data).
Step 5: Insert the New M.2 SSD
Take your new SSD and hold it at a 30-degree angle (pointing slightly upward). Align the notch on the drive with the key in the M.2 slot — they only fit one way. Slide the drive into the slot steadily. You’ll feel it seat. Once it’s fully inserted and level with the motherboard, gently press down and screw the standoff back in. Don’t over-tighten — hand-tight is enough. The drive should sit flat, parallel to the motherboard.
Step 6: Reattach Heat Shield or Thermal Pad (if Present)
If your laptop had a metal heatsink or thermal shield over the M.2 slot, reattach it now. Some laptops use a self-adhesive thermal pad that sits on top of the drive. If the old one came off, check if you need to replace it. Most modern NVMe drives have a thermal label on top, so a new pad may not be necessary — but if the old one was bonded to the shield, replace it with a fresh one from the thermal pad kit.
Step 7: Reassemble
Reattach the bottom panel and screw it back down. Reconnect power and any USB devices. Power on your laptop. Your new SSD should be detected automatically in Windows 10/11.
If Windows doesn’t recognize the new drive, see “Troubleshooting: SSD Not Showing Up” below.
Step-by-Step: Installing a 2.5″ SATA SSD
If your laptop has an older 2.5″ SATA bay instead of M.2, the process is similar but involves cables.
Step 1: Power Down and Open the Bottom Panel
Same as above — shut down, unplug, press power for 5 seconds, remove screws, set panel aside.
Step 2: Locate the 2.5″ SATA Bay
Look for a rectangular compartment about the size of a thick phone. You’ll see a SATA data cable (thin, L-shaped connector) and a SATA power cable (thicker, multiple pins) connected to it. The bay may have a rubber frame or caddy holding the drive.
Step 3: Disconnect and Remove the Existing Drive
Unplug both the SATA data and power cables from the back of the drive. If the drive is in a rubber caddy, you may need to unscrew small tabs on the sides to slide the drive out. Once disconnected, lift the drive out carefully.
Step 4: Install the New SATA SSD
Align your new SSD (same orientation as the old one) into the bay or caddy. Reconnect both the SATA data cable and power cable. They only fit one way. Make sure they click and seat fully. Secure the drive back in the caddy or bay with any screws if present.
Step 5: Reassemble
Reattach the bottom panel, screw it down, reconnect power, and boot up. Windows should detect the new drive automatically.
M.2 2230 vs 2280: Size Matters
The numbers refer to the form factor: 2230 means 22mm wide and 30mm long. 2280 is 22mm wide and 80mm long.
2280 (80mm): The standard for 99% of modern laptops. Dell XPS, Lenovo ThinkPad, HP Spectre, ASUS VivoBook, Acer Aspire — all use 2280.
2230 (30mm): Found in ultrabooks and ultra-thin devices: Microsoft Surface Laptop 5, Surface Pro 9, some ASUS ZenBooks, certain Dell XPS 13 models. Much shorter, looks like a tiny stick of gum.
If you buy the wrong size, it won’t fit. Check your laptop’s manual or teardown guide on YouTube to confirm.
What if you have a 2230 slot but want more capacity? Sadly, 2230 drives max out around 4TB, and options are limited. Your best bet is Samsung’s 870 QVO (2.5″ SATA, if your laptop has a 2.5″ slot) or finding a brand that makes high-capacity 2230 drives. Some enthusiasts use M.2 extension adapters, but this is not recommended in a laptop — they create airflow problems and heat issues.
How to Initialize Your New SSD
If you cloned your old drive, skip this section — your new SSD is already initialized and bootable.
If you did a fresh install or the drive isn’t showing up in Windows, you need to initialize it.
Initialize in Disk Management
Right-click Start, open Disk Management. Look for your new drive in the list — it will likely show as “Unknown” or “Not Initialized” with unallocated space. Right-click the drive, select “Initialize Disk”. Choose “MBR” for older laptops with BIOS, or “GPT” for newer laptops with UEFI (most modern machines use GPT). Click OK.
Once initialized, right-click the unallocated space and select “New Simple Volume”. Follow the wizard: assign a drive letter, choose a file system (NTFS for Windows, exFAT for compatibility), set a volume name, and format. The formatting is quick on an SSD (30 seconds to 2 minutes).
Your new SSD is now ready to use — either clone your old drive to it, or install Windows fresh and restore your files.
Brand-Specific SSD Upgrade Tips
Dell Laptops (XPS, Inspiron, Vostro)
Most Dell laptops use 2280 M.2 NVMe in a single slot. The XPS 13/15 and Inspiron 7000 series are easy opens — one or two bottom panel screws, then the drive is immediately visible. Older Vostro models may have SATA drives. Check your manual.
Lenovo ThinkPad
ThinkPads are known for being user-friendly. Most models (T14, T16, X1 Carbon, X1 Yoga) have a single M.2 slot easily accessible from the bottom panel. Some older models have SATA. The drives are rarely under a heatsink — direct access is typical.
HP Pavilion & Envy
HP is similar to Dell — 2280 NVMe is standard on recent models. The bottom panel usually pops off cleanly. Be careful with ribbon cables if you remove too much — some models have a keyboard connector near the SSD slot.
ASUS VivoBook & ROG
Most ASUS laptops use 2280 NVMe. Some ROG gaming models have a heatsink or thermal pad over the slot. VivoBooks are lightweight, so watch for adhesive tape holding components together. Otherwise straightforward.
Acer Aspire & Swift
Acer’s consumer lines (Aspire, Swift) use standard 2280 M.2 slots with minimal protection. Aspire One and older Swift models might have SATA. Check your manual.
Apple MacBook (Apple Silicon & Intel)
Important: Apple uses proprietary SSD modules (called Apple SSD) that are not standard M.2 drives. They won’t fit in a standard M.2 slot, and standard M.2 drives won’t fit in a MacBook. Upgrading a MacBook SSD requires either (a) sourcing an Apple SSD module from a third-party vendor, or (b) sending it to Apple for an expensive upgrade. Consumer upgrades are essentially impossible. If you have a MacBook with insufficient storage, consider an external Thunderbolt SSD instead.
Common SSD Installation Mistakes
Mistake 1: Forcing the Drive Into the Slot
M.2 drives have a notch that aligns with a key in the slot. If it’s not sliding in smoothly, you’re probably at the wrong angle or pushing from the wrong side. Don’t force it. Stop, re-examine, and re-align.
Mistake 2: Over-Tightening the Standoff Screw
Hand-tight is all you need. Over-tightening can crack the drive or the motherboard. If the drive won’t stay down after a gentle screw, you’re probably not seated fully. Remove the screw, re-seat the drive at the correct angle, then screw back in lightly.
Mistake 3: Not Discharging Static Electricity
Static discharge can fry components without you knowing. Before opening the laptop, touch a metal part of the chassis with your bare hand. If you’re worried, wear an anti-static wrist strap clipped to the chassis. It’s not overkill — it’s cheap insurance.
Mistake 4: Touching Gold Connectors
The gold connectors on the drive are sensitive. Avoid touching them directly. If you do, wipe gently with a clean, dry cloth if needed — don’t use water or solvents.
Mistake 5: Forgetting to Remove Protective Film
Some new SSDs come with a clear protective film on the bottom. If your drive came with one, peel it off before installation. It won’t harm anything if left on, but good practice is to remove it.
Mistake 6: Mixing Up M.2 Slots
Some high-end laptops (gaming models, workstations) have two M.2 slots. They may not be identical — one might support NVMe and the other SATA, or they might have different speed limitations. Check your manual to confirm which slot to use for your drive.
Troubleshooting: SSD Not Showing Up
Windows Doesn’t See the Drive in File Explorer
The drive is installed physically, but Windows doesn’t recognize it. Try these steps in order:
- Check in Disk Management: Right-click Start, open Disk Management. Do you see your new drive listed? If yes, it’s detected but not initialized. See “How to Initialize Your New SSD” above.
- Restart your laptop. Sometimes Windows needs a reboot to recognize new hardware.
- Check BIOS: Restart and enter BIOS (usually F2, F10, or Del depending on your manufacturer). Look for a storage or drives section. Is your new SSD listed there? If yes, it’s a Windows/driver issue. If no, continue to next step.
- Reseat the drive: Power down, unplug, open the panel, remove the SSD, and re-insert it, ensuring it’s fully seated. Replace the bottom panel and try again.
- Check for NVMe drivers: If it’s a brand-new NVMe drive, Windows may need to load a driver. Visit the drive manufacturer’s website and download the NVMe driver for your drive model. Install it and restart.
- Try a different M.2 slot: If your laptop has two M.2 slots, try the other one to rule out a hardware failure in the first slot.
Drive Shows in Disk Management but Not in File Explorer
The drive is detected but not mounted. It needs to be initialized and a volume created. Right-click the uninitialized disk in Disk Management, select “Initialize Disk”, choose GPT, and create a new simple volume (see “How to Initialize Your New SSD” above).
BIOS Doesn’t See the Drive
This suggests a hardware issue — either the drive isn’t fully seated, the M.2 slot is faulty, or the drive itself is defective. Try reseating it first. If that doesn’t work, test the drive in a desktop computer (using an M.2 USB adapter) to confirm it’s not dead on arrival. If it works in a desktop but not your laptop, the M.2 slot may be faulty and you may need warranty service.
Drive Detected but Freezing or Slow Performance
This is rare but can happen if the drive isn’t getting good thermal contact. Check that any thermal pads or heatsinks are properly seated. Also confirm you’re using the correct drive for your laptop’s capabilities — putting a PCIe Gen 5 drive in a Gen 3 slot won’t cause freezing, but very old/low-spec laptops may have compatibility quirks.
Recommended Laptop SSDs (2026)
These are the best M.2 NVMe drives for laptop upgrades across different price points and capacities. All links are Amazon affiliate links.
| Product | Capacity | Interface | Read Speed | Best For | Amazon |
| Samsung 990 Pro | 1TB, 2TB, 4TB | PCIe Gen 4 | 7,100 MB/s | Gaming, content creators, high performance | View on Amazon |
| Samsung 990 EVO Plus | 1TB, 2TB | PCIe Gen 4 | 5,000 MB/s | Best overall — fast, reliable, affordable | View on Amazon |
| WD Black SN850X | 1TB, 2TB | PCIe Gen 4 | 7,100 MB/s | Gaming, performance-focused laptops | View on Amazon |
| Kingston NV2 | 512GB, 1TB, 2TB | PCIe Gen 3 | 3,500 MB/s | Budget-friendly, still much faster than SATA | View on Amazon |
| Crucial T500 | 500GB, 1TB, 2TB | PCIe Gen 5 | 12,400 MB/s | Next-gen laptops, future-proof | View on Amazon |
| SK hynix P41 Platinum | 500GB, 1TB, 2TB | PCIe Gen 4 | 7,100 MB/s | High performance, very reliable, competitive price | View on Amazon |
| Sabrent Rocket Nano 2230 | 256GB, 512GB, 1TB | PCIe Gen 4 | 5,000 MB/s | Ultrabooks, Surface devices, Microsoft Surface Pro | View on Amazon |
| Micron Crucial P5 | 500GB, 1TB, 2TB | PCIe Gen 3 | 3,400 MB/s | Budget option, older but reliable | View on Amazon |
| Corsair MP600 CORE XT | 500GB, 1TB, 2TB | PCIe Gen 4 | 4,950 MB/s | Solid all-rounder, good price-performance | View on Amazon |
| ADATA XPG Gammix S70 | 512GB, 1TB, 2TB | PCIe Gen 4 | 7,100 MB/s | Gaming, performance-oriented, excellent thermal management | View on Amazon |
Capacity advice: For a primary drive, go 1TB minimum. If your laptop shipped with 256GB or 512GB, upgrading to 1TB or 2TB makes a massive difference — more room for applications, games, and media without constantly managing storage. If budget is tight, 512GB is acceptable for light users.
Speed advice: PCIe Gen 3 drives (3,000–3,500 MB/s) are still fast and very affordable. PCIe Gen 4 drives (5,000–7,100 MB/s) are the sweet spot for 2026 — noticeably faster, especially for large file transfers and video editing. PCIe Gen 5 drives (12,000+ MB/s) are the future but currently overkill for most laptops; unless you’re doing heavy professional work, Gen 4 is more cost-effective.
Brand reliability: Samsung, WD, Kingston, and Crucial are the most trusted. All have excellent warranties (5-year limited is standard). Avoid no-name generic drives on Amazon.
Frequently Asked Questions
Q: Will my laptop become faster with an SSD upgrade?
Yes, dramatically. If you’re upgrading from a mechanical hard drive (HDD) to an SSD, you’ll see 3–5× speed improvements across the board. Boot time might drop from 2–3 minutes to 20–30 seconds. Application launch times drop from 10+ seconds to 1–2 seconds. File transfers are almost instant. If you’re upgrading from an older SATA SSD to a faster NVMe, the gains are smaller but still noticeable, especially in sustained workloads like video editing or large data transfers.
Q: Do I need a heat sink or thermal pad for my M.2 SSD?
Most modern M.2 drives have a thermal label (sticker) on top that conducts heat away from the chips. For everyday use in a laptop, this is enough. If your laptop had a heatsink or thermal pad over the M.2 slot originally, reattach it when you install the new drive — the thermal contact helps prevent throttling under sustained heavy load. Most gaming-focused SSDs (like WD Black) and high-performance drives (Samsung Pro) benefit from heatsinks, especially in thin laptops.
Q: Can I use an external SSD instead of opening my laptop?
Yes — if you’re uncomfortable opening your laptop, a Thunderbolt or USB-C external SSD is a safe alternative. However, external drives are slower than internal ones (USB 3.1 tops out at ~450 MB/s, Thunderbolt 3 at ~1,200 MB/s) and add bulk. An internal upgrade is always faster. That said, an external SSD is perfect as a secondary backup or for expanding storage without modifying the laptop.
Q: What if I have a newer laptop with soldered storage?
Some ultra-thin premium laptops (particularly MacBooks and some ultra-portable models from Dell, Lenovo, and HP) have storage soldered directly to the motherboard. These cannot be upgraded. If you have one, check your manual — it will state whether storage is upgradeable. If it’s soldered, your only option is to buy a laptop with higher storage from the start, or use an external drive.
Q: Do I need to install any drivers after installing a new SSD?
In most cases, no. Windows 10/11 recognizes standard M.2 NVMe drives automatically. However, some new drives (particularly brand-new Gen 5 models) may require a driver from the manufacturer for optimal performance. Check the drive manufacturer’s website and download the driver if available. It’s optional but recommended for firmware updates and diagnostic tools.
Q: Can I install both an SSD and HDD in my laptop?
Possibly, if your laptop has both an M.2 slot and a 2.5″ SATA bay. Some laptops do. You’d typically put the SSD as your primary boot drive and use the SATA drive for additional storage. However, check your laptop’s manual to confirm both bays are supported and that adding a second drive won’t void your warranty or cause thermal issues.
Q: Is it safe to clone my drive while the laptop is running?
Technically possible, but not recommended. Always shut down completely, disconnect power, and work on a static-free surface. Running cloning software in Windows while physically removing/installing hardware can cause data corruption or hardware damage. The safer method is to connect the new SSD via a USB enclosure (while the laptop is off), clone using cloning software, then install the cloned drive internally.
Q: What’s the difference between Gen 3, Gen 4, and Gen 5 PCIe?
Gen 3 = 3,500 MB/s theoretical max | Gen 4 = 7,000 MB/s | Gen 5 = 14,000 MB/s. In real-world laptop use, you’ll see Gen 3 drives at ~3,200–3,500 MB/s, Gen 4 at ~5,000–7,000 MB/s, and Gen 5 at ~12,000+ MB/s. For everyday computing (web browsing, Office, video playback), all three feel equally snappy. Gen 4 is the current standard and offers the best price-to-performance. Gen 5 is future-proof but not necessary unless you do heavy file transfers or video editing.
Q: Can I use an SSD designed for PS5 or Xbox Series X in my laptop?
No. Gaming consoles use proprietary specifications (different power requirements, form factors, or firmware). A PS5 SSD is specifically tuned for PlayStation and won’t work in a laptop, and vice versa. Always buy SSDs designed specifically for laptops/computers.
Q: What should I do with my old SSD after upgrading?
You have several options: (1) Keep it as a backup or second drive, (2) Put it in an external USB enclosure and use it for portable storage or backups, (3) Donate it to someone who needs extra storage, (4) Sell it on eBay if it’s still in good condition, (5) Wipe it securely with DBAN or similar software and recycle it responsibly. Don’t just throw it in the bin — SSDs contain valuable metals and should be recycled properly.
FAQ Schema
Related Guides & Tools
Want to check which SSDs work with your specific laptop before you buy? Use our Laptop SSD Compatibility Guide to look up your exact model and see compatible drives, capacities, and performance specs.
Still unsure whether your laptop can be upgraded? Try our Computer Compatibility Checker — answer a few questions about your laptop and we’ll tell you exactly what parts are compatible.
Need help with other upgrades? Check out our Laptop RAM Upgrade Guide and Charger Compatibility Guide.
Affiliate Disclosure
This page contains affiliate links to Amazon and other retailers. We may earn a commission if you purchase through these links, at no additional cost to you. We only recommend products we’ve researched and believe are genuinely useful. Your support helps keep this site running and allows us to produce more free guides like this one. Thank you.
Recommended NVMe SSD Upgrades
As an Amazon Associate we earn from qualifying purchases. Prices & availability shown on Amazon.