Introduction
You’ve ordered new RAM, spent twenty minutes opening up your laptop or desktop, carefully inserted the sticks, powered on… and something’s wrong. Your computer won’t boot. It beeps. You see a blue screen. Or the BIOS only recognizes half the RAM you installed.
Don’t panic. RAM upgrade problems are incredibly common, and almost all of them have simple fixes. Most issues are solved by reseating the sticks — literally removing them and pushing them back in firmly. Others involve BIOS settings, compatibility issues, or (rarely) a defective module.
This guide covers every major symptom you might encounter after upgrading RAM, walks you through diagnosis, and explains when the module itself might be the problem. By the end, you’ll either have working RAM or a clear understanding of what needs to be returned.
Quick Diagnostic Checklist
Before diving into specific troubleshooting, try this five-step checklist. It resolves the majority of RAM upgrade issues:
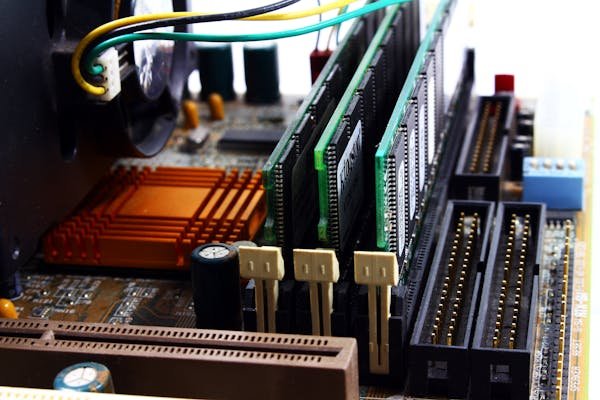
- Reseat the RAM. Power off completely, unplug the PC, press the power button a few times to discharge static electricity, and remove the RAM. Push it back in firmly until the clips on both ends snap closed. This fixes 80% of problems.
- Try one stick at a time. If you installed two sticks, remove one and test the PC with just the first. Then try the second stick alone. One might be incompatible or defective.
- Try different slots. If your motherboard has four DIMM slots or your laptop has multiple slots, try the RAM in each one. A bad slot can make it look like the RAM is broken.
- Clear CMOS / reset BIOS. Power off, unplug, remove the CMOS battery for 10 seconds, reinsert it, and power on. This resets BIOS to defaults and often fixes boot issues.
- Update BIOS. Visit your motherboard or laptop manufacturer’s website, download the latest BIOS update, and flash it. Older BIOS versions sometimes don’t recognize newer or higher-capacity RAM.
Try these five steps in order. If one works, you’re done. If all five fail, move to the specific symptom sections below.
Symptom 1: Computer Won’t Turn On at All
You press the power button and… nothing. No fan spinning. No lights. No beep codes. Completely dead.
First: Check power and connections. This sounds obvious, but ensure the power supply is turned on (switch on the back), the power cable is connected firmly, and if you’re on a laptop, it’s plugged in and charging. Try a different power outlet. Try a different power cable if you have one.
Second: Reseat everything. Even though you installed RAM, it’s possible something else came loose during the process. Open the PC again, remove and reinstall the RAM, then also reseat the power connector from the PSU to the motherboard (both the large 24-pin connector and the separate 8-pin CPU power, if present). Laptops: ensure the battery is properly seated and reconnected.
Third: Check for incompatible RAM voltage. This is less common but possible. RAM has specific voltage requirements — usually 1.35V for DDR4 laptop RAM, 1.2V for DDR5, etc. If you’ve installed high-speed “overclocked” RAM (like Corsair Vengeance with 1.45V) on a system that only supports 1.35V, the PC might refuse to boot.
Solution: Use the RAM that originally came with the system, or purchase RAM with standard voltage matching your system’s specs. Check the RAM packaging or manufacturer specs to verify voltage before buying.
Fourth: Try the original RAM. Remove the new RAM entirely and reinstall the original RAM. Does the PC boot? If yes, the new RAM is incompatible or defective. If no, something else went wrong during the upgrade (you may have accidentally disconnected something), and you need to systematically re-check all connections.
Symptom 2: Computer Powers On but No Display
The computer powers on — fans spin, lights are on — but you get no video output. The screen stays black. You might hear beep codes (short beeps in a pattern).
Listen to the beep pattern. Beep codes vary by BIOS manufacturer. Here’s a common guide:
| Beep Pattern | Meaning | Solution |
|---|---|---|
| 1 long, 2 short | Video card or memory issue | Reseat RAM, try different slots, try one stick at a time |
| 1 long, 3 short | Memory not detected | Reseat RAM firmly, swap sticks between slots |
| Continuous beeping | Critical memory error | Remove RAM, reseat, or try original RAM only |
| 1 short beep (normal) | PC is working fine (video may still not be connected) | Check monitor power and cable, try different video output |
If you hear beep codes, that’s actually good news — it means the BIOS is running but detecting an issue. Reseat the RAM and try again. If the beeping stops and you get video, you’re done.
If no beep codes: Ensure your monitor is powered on and the video cable is firmly connected to the correct port (HDMI, DisplayPort, or VGA). Try a different video cable or a different monitor if available. Reseat the RAM. Also reseat the video card if you have a dedicated GPU (open the slot clip, remove and reinstall the card firmly).
Symptom 3: Blue Screen of Death (BSOD) After RAM Upgrade
The PC boots, Windows loads, but then crashes with a blue screen showing an error code like “DRIVER IRQL NOT LESS OR EQUAL”, “MEMORY MANAGEMENT”, or “WHEA UNCORRECTABLE ERROR”.
This usually means memory timing incompatibility or a defective stick.
First: Disable XMP/EXPO in BIOS. When you add new RAM, BIOS should automatically detect it and run it at JEDEC speed (standard speed). However, if you have the new RAM and are trying to use an XMP or EXPO profile (overclocking profile), timing mismatches can cause BSOD.
Restart the PC and enter BIOS during boot (usually Delete, F2, or F12 — check your motherboard manual or the splash screen when you power on). Navigate to the “Overclocking” or “Performance” section and disable XMP or EXPO (look for something like “XMP Profile: Profile 1” — change it to “Disabled” or “JEDEC”). Save and restart.
If the BSOD stops, your new RAM is too aggressive for your system. Either use it at standard JEDEC speeds, or purchase lower-speed RAM. If the BSOD continues, move to the next step.
Second: Run Windows Memory Diagnostic. Windows includes a built-in memory test. Press Windows key + R, type “mdsched.exe”, and press Enter. Choose “Restart now and check for problems”. The PC will restart and run a memory test. This process takes 5–15 minutes. If errors are detected, the RAM stick is likely defective and should be replaced.
Third: Try each stick individually. If you installed two sticks, remove one, boot Windows, and run the memory test with just one stick. Then shut down, swap sticks, and test the second one alone. A bad stick will fail the test or cause BSOD on its own.
Symptom 4: Only Some RAM Detected (32GB Installed, BIOS Shows 16GB)
You installed 32GB (two 16GB sticks), but BIOS and Windows show only 16GB. Or you installed 64GB and see 32GB. Part of the RAM is missing.
First: Reseat both sticks. Ensure both sticks are pushed in fully until the plastic clips on both ends snap into the notches on the RAM. A partially seated stick won’t be recognized.
Second: Try both sticks in different slots. Swap their positions. If the BIOS now detects both sticks, one of the original slots is bad. If it still shows only half the RAM, move to step three.
Third: Check BIOS for RAM speed or channel settings. Some older or specialized BIOS versions have settings to disable dual-channel or limit RAM capacity. Enter BIOS and look for an option like “Dual Channel”, “Memory Channel”, or “Max Memory”. Ensure both are enabled and set to automatic. Save and restart.
Fourth: Check if you’ve hit a capacity limit. Some older laptops have a maximum supported RAM capacity — perhaps 16GB, even though they have two slots. Check your laptop’s manual or manufacturer specs. If you’re trying to install 32GB in a system that supports only 16GB, you’ll need to remove one stick.
Fifth: Check 32-bit vs 64-bit Windows. Windows 32-bit can address only ~3.5GB of RAM, regardless of how much is installed. Windows 64-bit supports hundreds of GB. Check by opening Settings > System > About and looking at “System type”. If it says “32-bit”, upgrade to 64-bit Windows (free through Windows Update on Windows 10/11) to use the full amount.
Symptom 5: RAM Running at Wrong Speed
BIOS shows your RAM as detected, but the speed is lower than expected. You installed 6000 MHz RAM, but BIOS shows it’s running at 3200 MHz. This is actually safe but slower than it should be.
This is usually XMP/EXPO related. By default, BIOS runs all RAM at JEDEC speeds — the conservative, guaranteed-safe speed. For high-speed RAM (like Corsair Vengeance Pro or G.Skill Flare), you need to enable the XMP (Intel) or EXPO (AMD) profile to achieve the rated speed.
Enter BIOS and look for “Overclocking”, “Performance”, “DRAM Settings”, or “XMP” (exact names vary). You should see something like “XMP Profile: Disabled” or “Profile 1”. Enable “Profile 1” or “Profile 2” (Profile 1 is usually the rated speed). Save and restart.
BIOS will now run the RAM at 6000 MHz (or whatever the rated speed is). This is safe and intended. Your system performance will improve noticeably.
If BSOD occurs after enabling XMP: The RAM is not stable at that speed on your system (compatibility issue). Disable XMP again and use the RAM at JEDEC speed, or purchase lower-speed RAM. See Laptop RAM Compatibility Guide for RAM recommendations that are known to work reliably.
Symptom 6: Random Crashes and Freezes After Upgrade
The PC boots and runs, but randomly crashes, freezes, or becomes unresponsive. Windows might close applications suddenly, or you get random reboots with no error message.
This suggests memory instability. The new RAM is either incompatible, running at a speed/timing it can’t handle, or one of the sticks is defective.
First: Disable XMP/EXPO. Restart in BIOS and disable any overclocking profile. Set the RAM to run at JEDEC defaults. If crashes stop, the RAM is not stable at the rated speed. You can either use it at JEDEC speed (slower but stable) or RMA the module.
Second: Run MemTest86. This is a more thorough memory test than Windows’ built-in tool. Download MemTest86 from memtest86.com, create a bootable USB using the ISO file (using Rufus or similar), plug it into your PC, boot from USB, and let the test run overnight. MemTest86 is very thorough and catches bad RAM that Windows may miss.
Third: Test one stick at a time. Remove one RAM stick, run MemTest86 with just the other, then swap and test the second stick. A bad stick will fail the test.
Fourth: Check RAM compatibility. Verify that the RAM type matches your system:
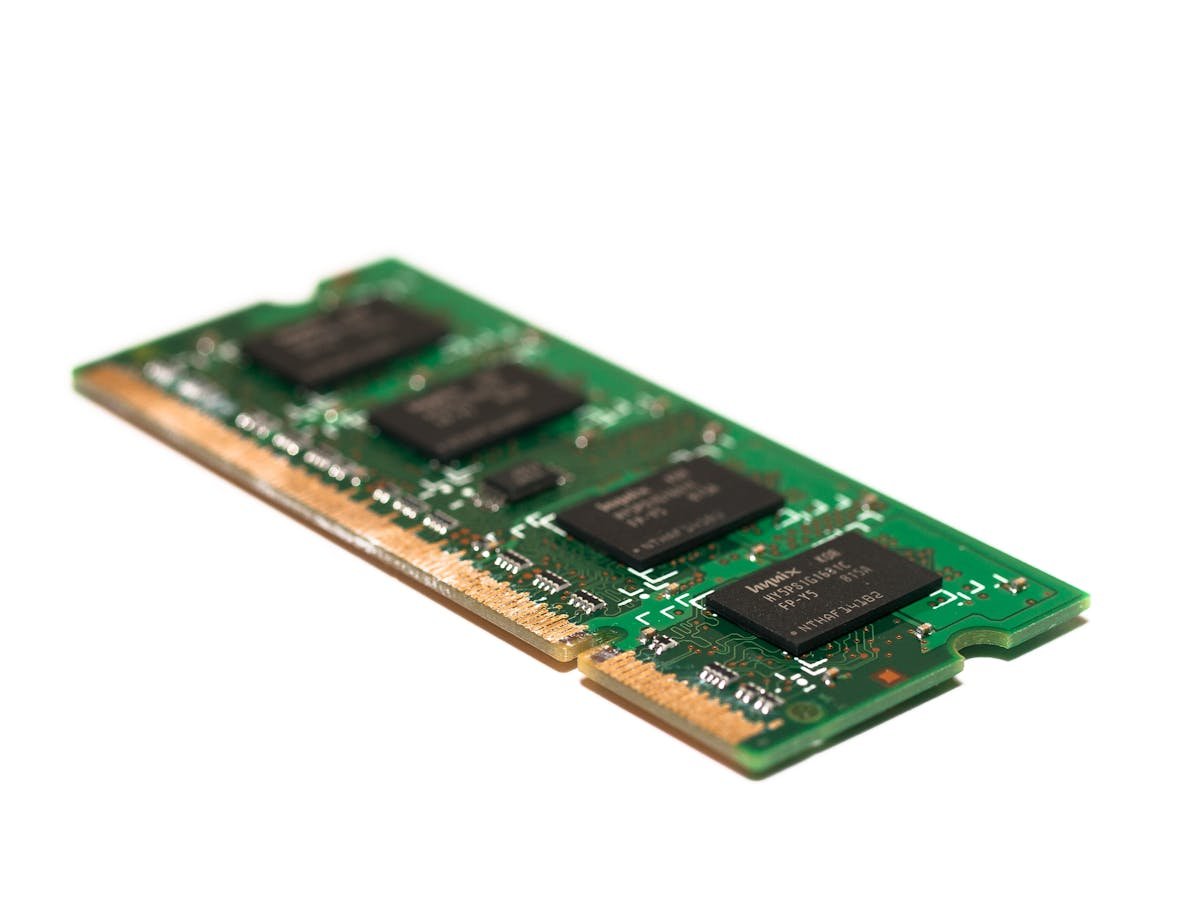
- Laptop RAM is different from desktop RAM (SODIMM vs DIMM physical connector). You cannot mix them.
- DDR4 and DDR5 are incompatible. Check your motherboard or laptop specs to see which generation you need.
- Rare: Some high-speed RAM (especially tight timings) is designed for specific motherboards. Check QVL (Qualified Vendor List) on your motherboard manufacturer’s website to see if the RAM is officially supported.
Use Laptop Upgrade Checker to verify exactly which RAM your system supports.
How to Run Memory Diagnostics
Windows Memory Diagnostic (Built-in, Quick)
Press Windows key + R, type “mdsched.exe”, and press Enter. Select “Restart now and check for problems”. The PC restarts and runs a basic memory test. This takes 5–15 minutes. If errors appear, at least one stick is likely bad.
MemTest86 (Thorough, Gold Standard)
This is the industry standard for memory testing. Here’s how to use it:
- On another PC or device, visit memtest86.com and download MemTest86 Free (the USB image).
- Use Rufus (rufus.ie) to write the ISO file to a USB drive. Select the USB drive, select the MemTest86 ISO, and click “Start”. This takes a few minutes.
- Plug the USB drive into your PC with the problematic RAM.
- Boot from USB. Most PCs show a “Press F12 to boot from USB” message during startup. If you don’t see it, restart and hold F12, F2, or Delete during boot (varies by system).
- MemTest86 will load and start testing automatically. Let it run for at least one full pass (30–60 minutes) or ideally overnight. Errors will show in red on the screen.
- If no errors appear after several passes, your RAM is likely fine.
- If errors appear, the RAM stick is defective and should be returned.
Prime95 (Extended CPU + Memory Stress Test)
For even more thorough testing, download Prime95 (mersenneforum.org/prime95/). Run the “Blend” test, which stresses both the CPU and RAM. Let it run for 24 hours if you can. If it completes without errors, your RAM is solid. If it crashes or reports errors, the RAM or CPU may be unstable.
How to Reset BIOS / Clear CMOS
Sometimes BIOS gets confused by new hardware and needs to be reset to defaults. This fixes many upgrade-related boot issues.
Method 1: CMOS Battery (Safest)
- Power off the PC completely and unplug the power cable.
- Open the PC case (laptops: skip this method; see Method 2 instead).
- Locate the CMOS battery on the motherboard — it’s a small, round, coin-sized battery (usually silver-colored).
- Gently remove the battery (you may need to lift a small clip holding it in place).
- Wait 10 seconds. This discharges the CMOS capacitors.
- Reinsert the battery. Ensure it clicks back into place.
- Close the case and power on. BIOS will reset to defaults, and you’ll boot normally.
Method 2: BIOS Jumper (Motherboard Specific)
Some motherboards have a jumper labeled “CMOS”, “PSW”, or “CLR CMOS” that you can move to reset BIOS. Check your motherboard manual to locate it. Move the jumper from pins 1–2 to pins 2–3, wait 10 seconds, then move it back. This resets BIOS without removing the battery.
Method 3: BIOS Reset Button (Newer Boards)
Many newer motherboards (last 3–4 years) have a physical button on the back I/O panel labeled “CMOS” or “BIOS”. Hold it for 5–10 seconds while the PC is powered off. This resets BIOS instantly.
Method 4: Laptop CMOS Reset
Laptop CMOS batteries are usually not user-removable. Instead, try: Power off, remove the power cable, remove the battery (if removable), and press the power button 5–10 times to drain capacitors. Wait 30 seconds, reinsert the battery, plug in power, and restart. This sometimes resets BIOS on laptops.
When to Return the RAM
If you’ve tried all the troubleshooting steps above and your RAM still doesn’t work, it’s time to return it.
Clear signs the RAM is defective:
- MemTest86 reports errors on one specific stick.
- You’ve tried the stick in multiple slots and systems — it always fails.
- All other sticks in the system work fine; this one doesn’t.
- The stick is visibly damaged (bent pins, burn marks, cracked plastic).
Return process:
- Contact the seller (Amazon, Scan, Overclockers, etc.) or the RAM manufacturer (Corsair, Kingston, G.Skill, etc.).
- Request an RMA (Return Merchandise Authorization). Provide proof of purchase and describe the issue.
- Ship the defective stick back (usually seller or manufacturer covers shipping).
- You’ll receive a replacement or refund within 1–2 weeks.
Most RAM comes with a lifetime warranty, so RMA is usually straightforward and free.
Recommended Reliable RAM for Laptops and Desktops
To avoid compatibility issues in the future, here are RAM modules known for reliability and wide compatibility:
| RAM Model | Type | Capacity | Best For | Link |
|---|---|---|---|---|
| Corsair Vengeance DDR5 SODIMM | Laptop (SODIMM) | 32GB | High-performance laptops, Gaming | View on Amazon |
| Kingston Fury Impact DDR5 SODIMM | Laptop (SODIMM) | 32GB | Gaming, video editing, reliable | View on Amazon |
| Crucial DDR5 SODIMM | Laptop (SODIMM) | 16GB | Budget laptops, good compatibility | View on Amazon |
| Corsair Vengeance DDR5 DIMM | Desktop (DIMM) | 32GB | Gaming PCs, content creation | View on Amazon |
| Kingston Fury Beast DDR5 DIMM | Desktop (DIMM) | 32GB | Gaming, workstations, overclocking | View on Amazon |
| G.Skill Ripjaws DDR5 | Desktop (DIMM) | 32GB | Gaming, tight timings, performance | View on Amazon |
| Crucial DDR4 SODIMM | Laptop (SODIMM) | 16GB | Older laptops, budget, reliable | View on Amazon |
| Kingston Fury Beast DDR4 DIMM | Desktop (DIMM) | 16GB | Budget desktops, compatibility | View on Amazon |
Frequently Asked Questions
Can bad RAM damage my motherboard?
Not typically. RAM that doesn’t work will either not be recognized or cause a crash. It won’t damage the motherboard, CPU, or other components. The worst that happens is the system won’t boot — which is harmless and reversible by removing the bad RAM.
How do I know if RAM is dead?
MemTest86 errors on a specific stick, or a single stick causes boot failure while other sticks work. Try the problematic stick in another PC — if it fails there too, it’s dead. Dead RAM shows no physical signs; it just doesn’t work.
Can mixing RAM brands cause problems?
Generally no. Mixing Corsair and Kingston, or Samsung and Crucial, is fine as long as the RAM type, speed, and voltage match. Windows doesn’t care about brands. However, mismatched speeds or voltage can cause crashes. Use the Laptop Upgrade Checker to verify exact compatibility.
Should I update BIOS before upgrading RAM?
Not strictly necessary, but it’s good practice. If you’re upgrading from DDR4 to DDR5, or using very new high-capacity modules, an updated BIOS might be required for recognition. Check your motherboard manufacturer’s website to see if a BIOS update adds support for your new RAM.
Why does my laptop beep after installing RAM?
Beeping usually indicates a memory detection issue. Reseat the RAM firmly — push it straight down until you hear a click. If beeping continues, try the RAM in the other slot (if your laptop has two slots). If only one stick works, the other slot or stick is defective.
Is it safe to leave bad RAM installed if I’m not using it?
Safe, but pointless. If Windows is only using one stick out of two installed, remove the bad one. It’s not providing any benefit, and you might accidentally configure something that tries to use it, causing crashes.
How long should I run MemTest86?
At minimum, let it run for one full pass (30–60 minutes). Ideally, run it overnight. The longer you test, the more confident you can be. Errors usually appear within the first few passes, but thorough testing catches intermittent issues.
Do I need to remove the RAM to access the CMOS battery?
Sometimes. On many motherboards, RAM blocks access to the CMOS battery. You may need to remove one or both RAM sticks temporarily to reach it. Once you’ve reset CMOS (by removing the battery for 10 seconds), reinsert the RAM.
What’s the difference between JEDEC and XMP speeds?
JEDEC is the industry standard, guaranteed-safe speed that all systems support. XMP (Intel) and EXPO (AMD) are overclocking profiles that run RAM faster. JEDEC is ~3200 MHz for DDR4, ~4800 MHz for DDR5. XMP/EXPO might be 6000 MHz or higher. XMP/EXPO is stable on most systems but can cause crashes if incompatible. Use JEDEC if XMP causes BSOD.
Related Guides
RAM upgrade issues often lead to other questions. Check these guides for related topics:
- Laptop RAM Compatibility Guide — Learn exactly which RAM works with your laptop model.
- Laptop Screen Compatibility Guide — Planning other laptop upgrades while you’re inside? Replace the screen too.
- Laptop Battery Replacement Guide — Often opened at the same time as RAM. Battery upgrade guide walks you through it.
- Laptop SSD Compatibility Guide — Combine RAM and SSD upgrades for maximum performance boost.
Not sure if your RAM upgrade is compatible? Use the Laptop Upgrade Checker — enter your device model and see all compatible RAM, SSDs, chargers, and more in seconds.
Affiliate Disclosure
This site contains affiliate links to Amazon. When you purchase RAM through one of our links, we earn a small commission at no additional cost to you. This helps us maintain free troubleshooting guides and compatibility resources. Thank you for your support.
Recommended Laptop RAM Upgrades
As an Amazon Associate we earn from qualifying purchases. Prices & availability shown on Amazon.