When Should You Replace Your Laptop Battery?
Most laptop batteries last 2-5 years before their capacity degrades significantly. If your battery now holds less than 50% of its original capacity, shuts down unexpectedly at high charge percentages, or shows physical swelling, it’s time for a replacement. The good news — replacing your battery yourself can save £80-150 compared to manufacturer service, and modern laptops are getting increasingly repairable.
This guide walks you through checking battery health, selecting the right replacement, and installing it safely. Whether you have an internal battery (most modern laptops) or a removable one (some ThinkPads and older models), we’ll cover both scenarios with step-by-step instructions.
Signs Your Laptop Battery Needs Replacing
Before you start, confirm your battery is actually failing. Degradation is normal, but sometimes the issue is software-related (poor power management) rather than hardware.
Check Battery Health on Windows
Open Command Prompt as Administrator and run:
powercfg /batteryreport
This generates an HTML file showing your battery’s Design Capacity (original) versus Full Charge Capacity (current). A healthy battery should retain 80-90% of design capacity. If you’re at 50% or below, replacement is overdue. Pay attention to the “Cycle Count” — each full charge/discharge cycle slightly degrades capacity. Over 1,000 cycles with heavy use is normal for a 4-year-old battery.
Check Battery Health on macOS
Click the Apple menu → System Settings → Battery. Look for the “Condition” field. Apple shows “Normal”, “Replace Soon”, “Replace Now”, or “Service Battery”. If it says anything other than “Normal”, your battery is genuinely failing.
For deeper detail, hold Option and click the battery icon in the menu bar. Note the “Cycle Count” — Apple typically recommends replacement around 1,000 cycles, though batteries often function beyond that.
Physical Symptoms
A swollen battery is a serious warning sign. If your trackpad feels raised or the bottom panel is bulging, stop using the laptop immediately — a failing lithium battery can catch fire. In rare cases, swelling is severe enough to require professional removal. If the battery is slightly swollen but still accessible, you can usually remove it following this guide, but work carefully and consider professional help if you’re uncomfortable with the process.
How to Find the Right Replacement Battery
Using the wrong battery can damage your laptop or be a safety risk. Your battery must match your laptop’s voltage (V) and capacity (Wh — watt-hours).
Finding Your Battery Part Number
The easiest way is to check your current battery’s label. Open your laptop and look at the battery itself — you’ll see a white label with the part number, voltage, and Wh rating. Write this down exactly.
Alternatively, find your laptop’s service manual online (search “[Your brand] [model] service manual PDF”) or visit the manufacturer’s support page. The manual will list the correct battery part number and electrical specs.
For popular laptop brands, you can also look on Amazon for your specific model — third-party sellers usually list compatible part numbers in the product description.
OEM vs Third-Party Batteries
Original Equipment Manufacturer (OEM) batteries are made by the same company that supplies your laptop brand. They’re more expensive (£80-120) but carry full warranty and guaranteed compatibility. Third-party batteries (Green Cell, DTK, Duracell) are significantly cheaper (£30-60) and often just as reliable if you buy from reputable sellers, but check reviews carefully and ensure they have safety certifications (CE, UL, FCC mark).
The voltage and Wh must match exactly. A battery with different electrical specs will either not work, charge incorrectly, or potentially damage your motherboard.
Tools You’ll Need
Most laptop batteries require minimal tools. Here’s what you should have on hand:
| Tool | Purpose | Where to Buy |
|---|---|---|
| Phillips #0 Screwdriver | Remove bottom panel and battery screws | Amazon |
| Anti-Static Wrist Strap | Prevent static discharge to motherboard | Amazon |
| Plastic Spudger / Pry Tool | Gently disconnect battery cable and pry panel edges | Amazon |
| Tweezers | Handle small connectors safely | Amazon |
| Adhesive Remover (optional) | Remove adhesive tape holding battery | Amazon |
| Compressed Air | Blow dust from vents during reassembly | Amazon |
Safety Precautions — Critical Before You Start
Lithium batteries are generally safe when handled normally, but they demand respect. A damaged lithium battery can overheat and catch fire.
Never Do These Things
- Never puncture or crush the battery — even a small hole can cause internal short circuits and ignition
- Never short the terminals — don’t let metal tools touch both battery terminals simultaneously
- Never expose the battery to extreme heat — keep it away from radiators, direct sunlight, or heat sources while working
- Never try to disassemble the battery casing — the cells inside are individual hazards
- Never force a swollen battery out — if it’s severely swollen and won’t lift after removing screws, stop and seek professional help
If Your Battery Is Swollen
A slightly puffy battery is often still removable — just work slowly and carefully. Gently pry from one edge and let it slide out gradually. If the battery is severely swollen (visibly bulging, hard to move), do not force it. Swelling indicates internal damage and pressure is building. Take your laptop to a repair centre instead. Disposal is also critical — never bin a swollen or damaged lithium battery. Contact your local hazardous waste facility or a phone/electronics recycling centre.
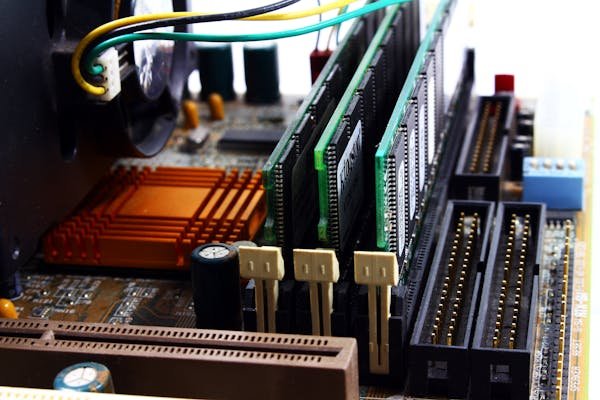
Step-by-Step: Replacing an Internal Laptop Battery
This is the most common scenario — batteries glued or screwed into the chassis. Examples: most Dell XPS, HP Pavilion, ASUS VivoBook, and recent MacBooks.
Step 1: Power Down and Disconnect
Shut down your laptop completely. Don’t just put it to sleep — power off entirely. Unplug the charging cable and wait 5 minutes to let any residual charge dissipate.
Step 2: Remove the Bottom Panel
Flip the laptop upside down. Locate all screws holding the bottom panel (usually 6-12 Phillips screws). Some panels are held partly by clips — if you feel resistance, don’t force it; look for hidden screws. Carefully remove all screws and keep them in order (tape them to a piece of paper labelled “Bottom Panel” for reassembly). Lift the panel off — you should now see the battery, usually a rectangular black or silver unit.
Step 3: Disconnect the Battery Cable
The battery is connected to the motherboard via a flat white or black connector cable — usually a JST or similar small connector. Using your spudger or fingernail, gently lift the connector tab and slide the connector off. This is the safest step because it immediately cuts power. Don’t use force — these connectors are delicate and easy to break. If it won’t budge after a gentle wiggle, double-check you’re not missing a locking clip.
Step 4: Remove the Old Battery
The battery is held down by 1-2 screws or by strong adhesive strips. If it has screws, remove them. If it’s glued, use your spudger to gently pry one edge of the battery upward — it’ll usually come loose gradually. Once you’ve lifted one corner slightly, use your spudger or a plastic card to slide underneath and break the adhesive bond. Work around all edges until the battery lifts out freely. Don’t yank it — patient, gentle prying prevents damage to the frame and cables.
If adhesive is particularly stubborn, apply a small amount of adhesive remover (Goo Gone or similar) to the edges, wait 30 seconds, and try again. Avoid getting any liquid on the circuit board.
Step 5: Place the New Battery
Remove any adhesive strips from the new battery (usually pre-applied). Carefully position the new battery into the space, aligning the connector cable toward the motherboard. Press it down firmly so any new adhesive strips bond properly.
Step 6: Reconnect the Battery Cable
Slide the connector onto the motherboard’s battery port. You should hear or feel a small click when it’s fully seated. Gently tug the connector to confirm it’s locked.
Step 7: Reassemble
Place the bottom panel back on and reinstall all screws in reverse order. Don’t overtighten — these are fragile. Close your laptop.
Step 8: Calibrate the Battery
Before regular use, calibrate the battery so the system accurately reports charge percentage. Plug in and charge to 100%. Let it sit at 100% for 2 hours. Then use the laptop normally until it shuts down from low battery (don’t interrupt). Finally, plug in and charge to 100% again without interruption. This trains the firmware to accurately measure capacity.
Step-by-Step: Replacing a Removable Laptop Battery
Some business laptops (older Lenovo ThinkPads, some Dell Latitudes) have batteries you can swap in seconds — no tools required.
Step 1: Power Down
Shut down your laptop completely and unplug the charger.
Step 2: Locate the Battery Release Latch
On the bottom or side of your laptop, you’ll see a battery bay with a release lever or latch. Look for a small switch labelled with an arrow or battery symbol.
Step 3: Release and Remove
Push or slide the latch in the direction shown. The battery should spring out slightly or slide free. Pull it away from the laptop fully.
Step 4: Insert the New Battery
Align the new battery’s connector with the bay and slide it in firmly until you hear a click. The latch should lock automatically or slide back to the locked position.
Step 5: Calibrate
Follow the same calibration steps as above: charge to 100%, let sit for 2 hours, drain fully, recharge to 100%.
Brand-Specific Battery Replacement Tips
Different manufacturers design their chassis differently — some are easy to open, others require careful technique.
Dell XPS and Latitude Series
Dell’s premium XPS line typically requires removing the bottom panel (6-8 screws) and disconnecting a single cable connector. The battery is usually glued and can take some effort to pry free. Use your spudger patiently — rushing risks damaging the battery bay frame. ThinkPads and older Latitudes often have removable batteries (see above).
Lenovo ThinkPad
ThinkPads are perhaps the easiest laptops to upgrade. Many have removable battery bays (just unlatch and swap). For those with internal batteries, the bottom panel usually has only 4-6 screws and the battery is easily accessible. Lenovo designs are beautifully modular.
HP Pavilion and Envy
HP varies significantly by model — some have removable batteries, others have glued ones. Check your specific model’s manual. Some Envy models use particularly strong adhesive; take extra time and patience prying. The battery bay is usually on the left side of the chassis.
ASUS VivoBook and ROG
ASUS typically requires bottom panel removal (8-12 screws, some hidden under rubber feet). Batteries are usually glued. VivoBooks are generally straightforward; ROG gaming laptops sometimes have more complex layouts with components packed tightly. Go slowly and photograph each step.
Apple MacBook
MacBooks use adhesive strips and require the bottom panel removal. The battery is often the largest component and can be tricky to pry — Apple glues them down firmly. You’ll need a spudger and patience. Some newer MacBooks use a proprietary connector; verify your model can have the battery replaced before you start. Some newer Air and Pro models have batteries soldered to the logic board (not replaceable).
How to Calibrate Your New Battery
Battery calibration is critical for accurate charge reporting. Modern laptop batteries use a “fuel gauge” — a small circuit on the battery that estimates remaining charge based on voltage and current draw. This gauge needs to be trained to your specific battery.
The Calibration Process
Plug in your laptop and charge to 100%. Watch the charging LED or battery percentage to confirm it reaches 100% and the charging indicator shows “fully charged”. Wait 2 hours with the laptop plugged in — this settles any charging anomalies.
Then, with the laptop plugged in still, start working or playing a demanding game to use power — you want to push the CPU and GPU. Your laptop is now drawing power from the wall while the battery charges internally. This step trains the fuel gauge. Work for 30-60 minutes.
Now unplug the charger and use the laptop normally until it shuts down from low battery. Don’t save your work or interrupt — let it fully drain. This teaches the fuel gauge where “empty” is.
Finally, plug in and charge to 100% without interruption. Your battery is now calibrated and will report charge accurately for months to come.
Note: You don’t need to calibrate after every use — once per year or after major OS updates is sufficient.
OEM vs Third-Party Batteries — Comparison
The choice between genuine and third-party batteries depends on your budget and risk tolerance.
| Factor | OEM Battery | Third-Party Battery |
|---|---|---|
| Price | £80-150 | £25-60 |
| Warranty | 12-24 months | 6-12 months (varies) |
| Safety Certifications | Guaranteed CE, UL | Usually present but verify |
| Capacity Matching | Exact match guaranteed | Usually accurate, check reviews |
| Lifespan | 2-5 years typical | 1.5-4 years typical (varies) |
| Availability | Easy from manufacturer or Amazon | Easy from Amazon, eBay |
| Risk | Very low | Low if from reputable seller |
For business laptops where uptime is critical, OEM is usually worth the extra cost. For personal use or budget builds, a third-party battery from a seller with thousands of positive reviews is generally safe. Always check reviews specifically mention “exact fit for [your model]” and look for customers noting actual capacity and lifespan.
How to Dispose of Old Batteries Safely
Lithium batteries must never go in household waste bins — they’re a fire hazard in landfill and recycling facilities.
UK Recycling Options
- Battery Recycling Points — Most supermarkets (Tesco, Sainsbury’s, Waitrose) have battery collection bins at the entrance. Drop your old battery in and it’s handled safely. Locations: search battery recycling locations near me online.
- Currys and Electronics Retailers — Currys, John Lewis, Maplin, and similar electronics shops often accept batteries for recycling (sometimes free, sometimes small fee).
- Council Hazardous Waste Centre — Your local council may have a hazardous waste drop-off point. Search “[your council] hazardous waste” to find your nearest centre — these accept batteries, electronics, and other hazardous items for free.
- Post Offices — Some post offices participate in battery recycling schemes. Phone ahead to confirm.
If your battery is swollen or damaged, don’t delay disposal — handle it carefully (don’t jostle it) and take it to a recycling point immediately. Label it “SWOLLEN” if possible so staff know to handle it with caution.
Recommended Battery Replacement Tools & Batteries
| Product | Type | Price Range | Where to Buy |
|---|---|---|---|
| iFixit Pro Tech Toolkit | Tool kit | £50-70 | Amazon |
| iFixit Essential Electronics Toolkit | Tool kit | £20-30 | Amazon |
| Kaisi 136-in-1 Precision Screwdriver Set | Screwdriver set | £12-18 | Amazon |
| Anti-Static Wrist Strap (pack of 2) | Static protection | £8-15 | Amazon |
| Plastic Spudger & Pry Tool Set | Opening tools | £6-12 | Amazon |
| Duracell Laptop Battery (generic replacement) | OEM-quality battery | £35-70 | Amazon |
| Green Cell Laptop Battery | Budget replacement | £30-55 | Amazon |
| DTK Laptop Battery (multiple models) | Budget replacement | £25-50 | Amazon |
| Goo Gone Adhesive Remover | Adhesive removal | £5-8 | Amazon |
| Compressed Air Canister (pack of 2) | Cleaning | £8-12 | Amazon |
Frequently Asked Questions
How long do laptop batteries actually last?
Modern lithium batteries typically hold 80% capacity after 2 years and 50% capacity after 4-5 years of regular use. Actual lifespan depends on usage patterns — if you mostly work plugged in, your battery lasts longer. Heavy road warriors drain and recharge every day, so their batteries degrade faster. On average, expect 3-4 years before noticeable performance loss, and 5-6 years before replacement feels urgent.
Will replacing my battery void the warranty?
In most countries, including the UK, replacing a battery yourself does not void the manufacturer’s warranty — this is protected under consumer law (goods must last a reasonable length of time). However, if you damage other components during battery replacement, those damages may not be covered. Work carefully and you’re fine. If you’re still under warranty and uncomfortable opening your laptop, contact the manufacturer for a battery replacement service.
How do I check my current battery health without command line tools?
Windows: Settings → System → Battery. You’ll see a percentage, but that’s not true health. The powercfg /batteryreport command gives detailed metrics. macOS: System Settings → Battery → Condition field. This is the most straightforward method. Third-party apps like BatteryCare (Windows) or CoconutBattery (Mac) provide detailed info if you prefer a GUI.
Can I use a higher capacity battery in my laptop?
Not safely. Batteries must match the voltage and be within the same capacity range (Wh) as original. A higher-capacity battery might not fit physically, could damage the charging circuit, or won’t charge properly. Stick to the exact specification. The only exception is if the manufacturer makes a higher-capacity option for your exact model — even then, verify before purchasing.
Is it safe to use third-party batteries in my laptop?
Yes, if you choose reputable sellers and check certifications. Third-party batteries (Green Cell, DTK, Duracell) are used in millions of laptops and work reliably. The risk is low if you buy from Amazon (good returns policy) and pick sellers with thousands of reviews. Avoid ultra-cheap batteries with no reviews. Always verify the part number matches your laptop.
What if my laptop won’t recognize the new battery?
First, confirm the connector is fully seated by disconnecting and reconnecting it gently. If the battery still isn’t recognized, restart the laptop (sometimes the firmware takes a moment to detect the new battery). If that doesn’t work, check your BIOS settings — some older Dell and HP models require a BIOS reset to recognize new batteries (consult your manual). As a last resort, the new battery may be faulty — test with a different replacement if possible.
Can I replace my battery while the laptop is in sleep mode?
No. Always power down completely and wait 5 minutes before opening your laptop. Sleep mode still provides power to components and disconnecting the battery while powered could cause data loss or hardware damage. Full shutdown is essential.
Is thermal paste needed when replacing a battery?
No. Thermal paste is only needed if you’re removing the heatsink or CPU cooler during the battery replacement — which you shouldn’t need to do. Battery replacement doesn’t require touching thermal components. If you do accidentally disturb the CPU cooler, yes, you’ll need fresh thermal paste to reseat it properly.
Related Guides
For comprehensive laptop upgrade information, check these guides:
- Laptop Battery Replacement Guide — General battery compatibility information
- Laptop RAM Compatibility Guide — Upgrade RAM for more performance
- Laptop SSD Compatibility Guide — Add or upgrade storage
- Laptop Charger Compatibility Guide — Find the right power adapter
- Laptop Docking Station Compatibility Guide — Extend your ports
Use Our Laptop Upgrade Checker
Not sure if your laptop can be upgraded, or which components are compatible? Our Laptop Upgrade Checker tool instantly shows you upgrade options for your specific model — RAM, SSD, battery, charger, and more. Check your laptop model now.
Affiliate Disclosure
This article contains Amazon affiliate links (tag: compcompatibi-21). We earn a small commission when you purchase through these links, at no extra cost to you. This helps us maintain our site and provide free guides to help you upgrade your devices. Thank you for supporting our work.
Recommended Laptop Upgrades (RAM & SSD)
As an Amazon Associate we earn from qualifying purchases. Prices & availability shown on Amazon.