How to Install RAM in a Desktop PC: DDR4 & DDR5 Guide (2026)
Upgrading your desktop RAM is one of the easiest and most cost-effective performance improvements you can make. Whether you’re adding a second stick for dual-channel performance, upgrading from DDR4 to DDR5, or maxing out your system’s memory capacity—the physical installation process is straightforward. This guide walks you through every step, from checking compatibility to securing your modules and verifying detection in Windows.
Desktop RAM installation takes approximately 5–10 minutes and requires minimal tools. By the end, you’ll have faster multitasking, smoother gaming, and better application responsiveness. Let’s get started.
Before You Start: Check Compatibility
Before opening your case, confirm that your motherboard and RAM are compatible. There are three critical compatibility factors: DDR generation (DDR4 vs DDR5), DIMM form factor, and capacity limits.
DDR4 vs DDR5: These are physically incompatible—DDR4 and DDR5 modules have different notches and use different slot types. A DDR5 DIMM will not fit into a DDR4 slot, and vice versa. DDR4 uses a notch at position 43, while DDR5 uses a notch at position 36. If your motherboard supports DDR4, you must buy DDR4 RAM. If your board is DDR5-capable (Intel 13th gen and newer, AMD Ryzen 7000 series and newer), you’ll need DDR5 modules.
Determine your motherboard specs: The easiest way is to check your motherboard’s manual—this will list all compatible RAM types, maximum capacity, and supported speeds. If you don’t have the manual, you can identify your motherboard using CPU-Z (Windows) or Speccy. Open these tools, navigate to the “Mainboard” tab, and note the motherboard model. Then search the manufacturer’s website (ASUS, MSI, Gigabyte, etc.) for the manual or product page.
Check maximum capacity and configuration: Motherboards support a maximum amount of RAM—typically 32GB, 64GB, 128GB, or more depending on the board and processor. For example, most consumer-grade Intel Z790 boards support up to 192GB, while Ryzen 5000 boards may support 128GB. Your motherboard manual will specify this limit. Desktop boards typically have 2 or 4 DIMM slots; high-end workstation boards may have 6 or 8. For optimal performance with 2 sticks, use dual-channel configuration by populating slots A2 and B2 (we’ll explain this below). For 4 sticks, populate all slots.
For detailed compatibility information across specific CPU and motherboard combinations, consult our RAM Compatibility Guide, which covers DDR4, DDR5, and LPDDR5 across all major brands.
Tools You’ll Need
You’ll need very few tools for a RAM installation. Here’s what to have on hand:
| Tool | Why You Need It | Amazon Link |
|---|---|---|
| Phillips Screwdriver (magnetic preferred) | To open your case side panel and secure heatsinks | View on Amazon UK |
| Anti-static Wrist Strap | Prevents static discharge from damaging components | View on Amazon UK |
| Compressed Air | Cleans dust from RAM slots and inside the case | View on Amazon UK |
| Flashlight or Headlamp | Illuminates the inside of your case for visibility | View on Amazon UK |
Tip: While an anti-static wrist strap is recommended, many users skip this step. At minimum, ground yourself by touching the metal frame of your case before handling components, and avoid carpeted areas if possible.
Step-by-Step: Installing Desktop RAM
Step 1: Power Down and Discharge Static
Shut down your PC completely. Do not use Sleep mode—fully power off the system. Then, unplug the power cable from the back of your PSU. This is critical for safety. After unplugging, press the power button on your case for 5 seconds to discharge any residual power in the system. Wait 1–2 minutes before proceeding.
Step 2: Open the Side Panel
Most desktop cases have a removable side panel secured by two to four thumb screws or Phillips screws. Locate these on the back or right side of your case (when facing the front). Unscrew them completely and set them aside in a safe place—they’re easy to lose. Gently slide or swing the panel away from the case. Some panels use rails; others use friction. Don’t force it.
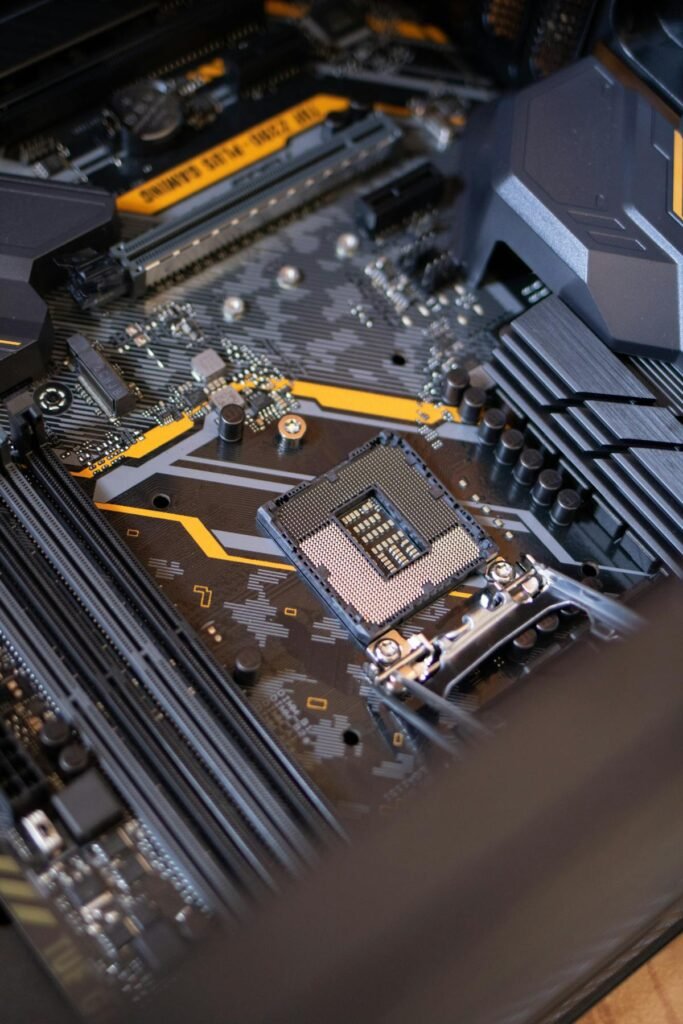
Step 3: Locate Your DIMM Slots
Inside your case, locate your motherboard. The DIMM slots are typically positioned vertically, running perpendicular to the motherboard surface, and are usually located between the CPU (the large heatsink near the center) and the rear I/O panel or GPU. On most boards, there are 2 or 4 slots. These slots are often color-coded—for example, slots 1 and 3 might be one color (forming one channel) and slots 2 and 4 another (forming a second channel). If unclear, check your motherboard manual.
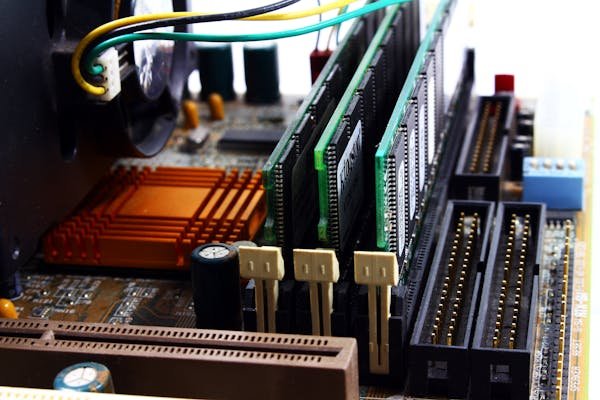
Step 4: Release Retention Clips
Each DIMM slot has a white or black plastic clip at one or both ends. These clips hold the RAM module in place once installed. You need to open these clips before inserting your new RAM. Press the clip(s) outward (away from the slot center) until they are fully released. The clips will snap back into place once you insert the module, so don’t worry about them falling out.
Step 5: Align the Module with the Slot
Hold your RAM module vertically, aligning it directly above the DIMM slot. The module has a small notch on its bottom edge that corresponds to a raised key in the slot. This notch prevents you from inserting the module incorrectly—it only fits one way. Align the notch on the RAM with the key in the slot, then slowly lower the module straight down until the bottom edge of the module is about 1 inch above the slot.
Step 6: Press Down Firmly Until Clips Snap
With the module aligned and lowered into position, press straight down with firm, even pressure on both ends of the module. You’ll feel resistance—this is normal. Continue pressing until you hear or feel a distinct click as the retention clips snap into place on both sides. The module should sit flush with the slot. If the clips don’t snap, the module isn’t fully seated. Remove it and try again, ensuring even pressure.
Step 7: Verify Proper Seating
Once installed, the RAM module should be completely level and flush with the motherboard surface. The retention clips should be fully engaged on both ends. Gently tug on the module from the top—it should not move. If it does, remove it and reseat it with more pressure.
Step 8: Close Your Case and Power On
Close your case side panel and resecure the screws. Plug the power cable back into your PSU, then power on your system. Your PC should boot normally. If your system won’t boot or beeps, see the Troubleshooting section below.
Dual Channel Configuration: Which Slots to Use
For maximum RAM performance, you want to enable dual-channel mode. This allows your CPU and motherboard to read from both RAM modules simultaneously, roughly doubling memory bandwidth compared to single-channel mode.
For 2 RAM modules (most common): Populate slots A2 and B2 (or slots 2 and 4, depending on your motherboard’s labeling). Consult your motherboard manual for the correct slot layout—the manual will diagram which slots form each channel. On most boards, slots 1 and 3 form one channel, and slots 2 and 4 form the other. By placing your two modules in slots 2 and 4, you ensure they’re in different channels, enabling dual-channel operation. Do not populate adjacent slots (e.g., slots 1 and 2) unless you’re using 3 modules and your board requires it.
For 4 RAM modules: Populate all four slots. Your motherboard will automatically configure them as dual-channel (or quad-channel on high-end HEDT boards).
Performance impact: Dual-channel mode delivers a 5–15% performance boost in memory-intensive tasks compared to single-channel mode. In gaming, the difference is usually 1–5 FPS depending on the game. In creative applications like video editing or 3D rendering, the boost can be more significant. For general use and web browsing, the difference is negligible, but it’s good practice to enable it anyway.
How to Verify Installation in Windows
Once your PC has booted, verify that Windows recognizes all your RAM. Right-click This PC or My Computer and select Properties. Under “Installed RAM,” you should see the total capacity of all your modules. For example, if you installed two 16GB modules, it should show 32GB. If Windows shows less than what you installed (e.g., it shows 16GB when you installed 32GB), see the Troubleshooting section below.
For more detailed information, open CPU-Z and click the Memory tab. This will show the speed, type (DDR4 vs DDR5), and channel configuration of your RAM. Confirm that Channels is set to Dual (or Quad for 4+ modules).
How to Enable XMP/EXPO After Installation (Optional)
Many RAM modules are rated for speeds higher than the motherboard’s default settings—for example, 6000MHz for DDR5 or 3600MHz for DDR4. To achieve these speeds, you need to enable XMP (Intel) or EXPO (AMD) in your BIOS. Without XMP/EXPO enabled, your RAM will run at the JEDEC default speed (3200MHz for DDR5, 2400MHz for DDR4), leaving performance on the table.
To enable XMP/EXPO: Restart your PC and enter the BIOS (usually by pressing Delete, F2, or F12 during startup—check your motherboard manual for the correct key). Navigate to the overclocking section (often labeled “Extreme Tweaker,” “Performance,” or “Overclocking”). Look for an option labeled “XMP” (Intel) or “EXPO” (AMD) and set it to “Enabled” or “Profile 1.” Save and exit the BIOS. Your system will reboot, and your RAM will now run at its rated speed.
For detailed XMP/EXPO instructions, refer to your motherboard manual or manufacturer’s support page. Enabling XMP/EXPO is safe and won’t void your warranty—it’s a feature built into the hardware.
Troubleshooting Installation Issues
PC Won’t Boot or Beeps After Installation
A beeping sound or failure to boot usually indicates the RAM isn’t properly seated. Power off, unplug the system, and reseat the module. Press straight down with firm, even pressure on both ends until you hear a distinct click. If the issue persists, try removing the new module and booting with your original RAM. If the system boots without the new module, the new RAM may be incompatible or defective. Test by installing it in a different slot or consult the RAM manufacturer’s support page.
One Stick of RAM Not Detected
If Windows or CPU-Z shows only one module instead of both, the non-detected module is likely not fully seated. Power off, reseat the missing module, and boot again. If one slot consistently fails to recognize RAM, the slot may be faulty. Try moving your RAM to different slots to isolate the problem. Contact your motherboard manufacturer if a slot is defective.
RAM Running at Slower Speed Than Rated
If CPU-Z shows your DDR5 RAM running at 3200MHz instead of its rated 6000MHz, XMP/EXPO is not enabled. Enter your BIOS and enable XMP or EXPO as described above. Without XMP/EXPO, high-speed RAM defaults to JEDEC standard speeds.
BIOS Shows Less RAM Than Installed
Some older BIOS versions have a 32GB or 64GB limit per DIMM slot. If you’re installing very large modules (64GB or more), your BIOS may cap recognition at a lower value. Update your motherboard BIOS to the latest version—the manufacturer’s support page has BIOS files and flashing instructions. Alternatively, contact your motherboard manufacturer to confirm maximum supported capacity.
Recommended Desktop RAM for 2026
Here are reliable, high-performance RAM options for desktop systems. All links are to Amazon UK and include our affiliate tag.
| Product | Capacity & Speed | Type | Best For | Amazon UK |
|---|---|---|---|---|
| Corsair Vengeance DDR5 | 32GB (2x16GB), 6000MHz | DDR5 | Intel 13th+ gen, AMD Ryzen 7000+ | View on Amazon UK |
| Kingston Fury Beast DDR5 | 32GB (2x16GB), 6000MHz | DDR5 | High-speed DDR5 gaming | View on Amazon UK |
| G.Skill Ripjaws DDR5 | 32GB (2x16GB), 6400MHz | DDR5 | Overclocking enthusiasts | View on Amazon UK |
| Crucial DDR5 | 32GB (2x16GB), 5600MHz | DDR5 | Budget DDR5 option | View on Amazon UK |
| Corsair Vengeance DDR4 | 32GB (2x16GB), 3200MHz | DDR4 | Intel 12th gen, AMD Ryzen 5000 | View on Amazon UK |
| Kingston Fury Beast DDR4 | 32GB (2x16GB), 3200MHz | DDR4 | DDR4 gaming systems | View on Amazon UK |
| G.Skill Ripjaws V DDR4 | 32GB (2x16GB), 3600MHz | DDR4 | DDR4 overclocking | View on Amazon UK |
| TeamGroup T-Force Vulcan DDR5 | 32GB (2x16GB), 6000MHz | DDR5 | Value DDR5 | View on Amazon UK |
| Corsair Vengeance DDR5 64GB | 64GB (2x32GB), 6000MHz | DDR5 | Content creators, workstation | View on Amazon UK |
| Crucial DDR4 3200MHz | 32GB (2x16GB), 3200MHz | DDR4 | Budget DDR4 upgrade | View on Amazon UK |
Frequently Asked Questions
Can I Mix DDR4 and DDR5 RAM in the Same System?
No. A motherboard supports either DDR4 or DDR5, not both. DDR4 and DDR5 modules have different physical notches and different pinouts, making them incompatible with each other. If your motherboard has DDR4 slots, you must use DDR4 modules exclusively. If it has DDR5 slots, you must use DDR5 modules. You cannot mix generations.
Which RAM Slots Should I Use for Dual-Channel with 2 Sticks?
Use slots A2 and B2 (or slots 2 and 4) on most consumer motherboards. Consult your motherboard manual for the specific slot layout and channel configuration. Placing your modules in non-adjacent slots ensures they’re in different channels, enabling dual-channel mode and maximizing performance.
Does RAM Speed Really Matter for Gaming?
RAM speed has a moderate impact on gaming performance. Faster RAM (6000MHz DDR5 vs 3200MHz DDR4) can improve gaming FPS by 2–8%, depending on the game and GPU. For competitive gaming, faster RAM is worth the investment. For casual gaming, standard-speed RAM (3200MHz for DDR4, 5600MHz for DDR5) is sufficient.
Is It Safe to Overclock My RAM with XMP/EXPO?
Yes. XMP (Intel) and EXPO (AMD) are manufacturer-certified profiles that are entirely safe to enable. They’re pre-tested by the RAM manufacturer and your motherboard manufacturer to work reliably together. Enabling XMP/EXPO will not void your warranty. It’s a feature, not an overclocking hack.
Can I Use Laptop RAM in My Desktop PC?
No. Laptop RAM (SODIMM) is physically smaller and uses a different form factor than desktop RAM (DIMM). A laptop RAM module will not fit into a desktop DIMM slot. Additionally, even if they were compatible physically, most laptop RAM has different voltage requirements and timings than desktop RAM. Always use desktop RAM for desktop systems.
What Happens If I Install More RAM Than My Motherboard Supports?
Your system will only recognize the maximum amount your motherboard supports. For example, if your board supports a maximum of 128GB and you install 192GB, Windows will recognize only 128GB. The excess capacity will go unused. Check your motherboard manual for the maximum supported capacity before buying RAM.
Do I Need to Update My BIOS Before Installing New RAM?
Not always, but it’s a good idea. If you’re installing very new RAM or very large capacity modules (64GB or more), updating your BIOS ensures compatibility and may unlock support for higher capacities. Check your motherboard manufacturer’s website for the latest BIOS version and release notes. If the new version mentions RAM compatibility improvements, update before installing.
Can I Install RAM While the System Is on?
No. Never install or remove RAM while the system is powered on or in Sleep mode. Always power off completely, unplug the power cable, and discharge static before handling components. Installing RAM in a powered system risks electrostatic discharge and hardware damage.
Related Guides & Tools
Want to ensure your RAM and other components are compatible? Use our Laptop & Desktop Compatibility Checker to verify RAM, SSD, and charger compatibility across 100+ laptop and desktop models.
For more in-depth compatibility information, check out our comprehensive guides:
- Laptop RAM Compatibility Guide (DDR4, DDR5, LPDDR5) — Complete compatibility matrix for DDR4, DDR5, and low-power variants across Intel and AMD platforms.
- Laptop SSD Compatibility Guide (NVMe, M.2, SATA) — Everything you need to know about SSD form factors and compatibility.
- Laptop Docking Station Compatibility Guide — USB-C, Thunderbolt, and DisplayLink dock compatibility across brands.
Affiliate Disclosure
This page contains Amazon UK affiliate links. We earn a small commission if you purchase through these links at no additional cost to you. This helps support our site and allows us to continue creating free guides and compatibility tools. We only recommend products we believe are reliable and offer good value.