How to Install an SSD in a Desktop PC: M.2 NVMe & SATA Guide (2026)
Desktop SSD installation is one of the most straightforward and impactful upgrades you can make—transforming your system’s responsiveness from boot times to application loading and file transfers. Modern desktops support two main SSD types: M.2 NVMe (the fast, small form factor now standard on all new boards) and 2.5-inch SATA (the previous generation, useful as secondary storage). This guide covers both installation methods step-by-step, from physical placement to initialization in Windows.
An M.2 NVMe installation takes roughly 5 minutes. A 2.5-inch SATA installation takes slightly longer due to mounting and cable routing, but remains straightforward. Whether you’re adding a second drive for storage, replacing a failing SSD, or setting up your first NVMe drive—this guide walks you through every step, tool requirement, and potential issue you might encounter.
Before You Start: Check Compatibility
Before opening your case, verify that your motherboard supports the SSD type you’re installing. Most modern boards have multiple M.2 slots and several SATA ports, but there are important considerations regarding slot sharing and PCIe generation support.
M.2 NVMe Compatibility: Nearly all modern desktop motherboards (2018 and newer) have at least one M.2 slot. High-end boards may have 2–4 M.2 slots. The crucial detail is the PCIe generation supported: PCIe Gen3 (up to 3,500 MB/s), PCIe Gen4 (up to 7,400 MB/s), or PCIe Gen5 (up to 14,000 MB/s). Your motherboard manual will specify this. A Gen3 board can accept a Gen4 SSD, but the SSD will run at Gen3 speeds. Buying a Gen5 SSD for a Gen3 board is a waste—you won’t see the speed benefits. Match your SSD’s PCIe generation to your board’s highest generation for best performance.
M.2 Slot Sharing: Some boards—particularly budget and mid-range models—share bandwidth between M.2 slots and SATA ports. If you populate a specific M.2 slot, one or more SATA ports may be disabled automatically. This is rare on modern boards but worth checking. Look in your motherboard manual under “M.2” or “Storage” for any notes about slot sharing. For most users, this is a non-issue, but it’s good to know.
2.5-inch SATA Compatibility: All desktop motherboards have at least 2–4 SATA ports, supporting 2.5-inch SSDs and 3.5-inch mechanical hard drives. Verify that your case has either a 2.5-inch drive bay or a 3.5-inch bay with a 2.5″ adapter bracket (most cases include this). Older cases may not have dedicated 2.5-inch bays, requiring an adapter or creative mounting.
For detailed SSD compatibility information across different motherboards and PCIe generations, consult our comprehensive SSD Compatibility Guide, which covers NVMe, SATA, M.2 form factors, and PCIe Gen3, Gen4, and Gen5 support across all major platforms.
Tools You’ll Need
SSD installation requires minimal tools—mostly just a screwdriver. Here’s the complete list:
| Tool | Purpose | Amazon Link |
|---|---|---|
| Phillips Screwdriver | Open case, secure M.2 heatsinks, mount SATA SSDs | View on Amazon UK |
| Anti-static Wrist Strap | Prevent electrostatic discharge (ESD) damage | View on Amazon UK |
| Compressed Air (or Air Blower) | Clean dust from M.2 slots and case interior | View on Amazon UK |
| 2.5″ Drive Mounting Bracket | Mount 2.5″ SSD in 3.5″ bay (if needed) | View on Amazon UK |
| Flashlight or Headlamp | Illuminate the case interior for visibility | View on Amazon UK |
| Thermal Pads (optional) | Improve M.2 heatsink contact (usually included with SSD) | View on Amazon UK |
Note: Most M.2 SSDs come with thermal pads pre-installed or included. Check your SSD’s packaging before purchasing additional thermal pads.
Step-by-Step: Installing an M.2 NVMe SSD
Step 1: Shut Down and Discharge Static
Power off your PC completely—do not use Sleep mode. Unplug the power cable from your PSU, then press the power button for 5 seconds to discharge residual power. This is essential for safety and to prevent damaging your components. Wait 1-2 minutes before opening your case.
Step 2: Open Your Case
Locate the screws securing your case’s side panel (usually on the back or right side when facing the front). Remove them and gently slide or swing the panel away. Set screws aside in a safe spot—they’re small and easy to lose.
Step 3: Locate the M.2 Slot on Your Motherboard
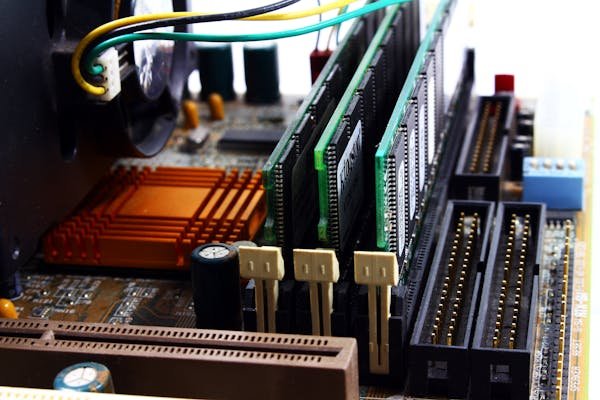
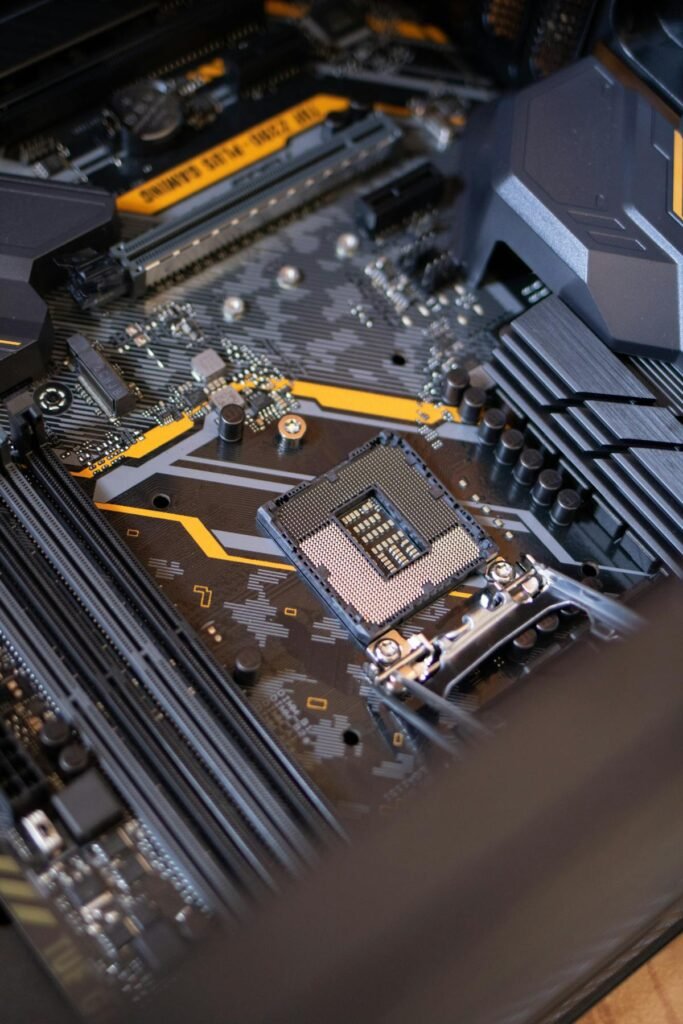
M.2 slots are typically located vertically on the motherboard, positioned between the CPU (large heatsink near the center) and the rear I/O panel, or sometimes near the GPU slot. Most boards have 1-4 M.2 slots. On boards with multiple slots, they may be labeled M.2_1, M.2_2, etc. If you’re installing your first NVMe drive, populate M.2_1 (the primary slot). If you’re adding a second drive, populate M.2_2, and so forth. Consult your motherboard manual for the exact slot layout and which PCIe generation each slot supports.
Step 4: Remove the M.2 Heatsink (if present)
Many modern boards have a heatsink over the M.2 slot to improve thermal performance. If your board has one, it’s secured by a single small Phillips screw. Remove this screw and lift the heatsink away. Some heatsinks have a thermal pad on the underside—don’t lose it, as you’ll need to reinstall it. Set it aside on a clean surface. If your M.2 slot has no heatsink, proceed to Step 5.
Step 5: Insert the M.2 SSD at a 30-Degree Angle
Hold the M.2 SSD by its edges (avoid touching the gold connector pins on the underside). Position the SSD above the M.2 slot at roughly a 30-degree angle—think of it like inserting a cartridge into a game console. The SSD’s notch will align with the key in the slot. Gently push the SSD into the slot at this angle until you feel resistance. The SSD should slide in smoothly without excessive force.
Step 6: Lower and Secure the SSD Flat
Once the SSD is inserted into the slot, gently press downward on the opposite end of the SSD (the end farther from the slot) until it lies flat on the motherboard. When fully inserted, the SSD should be horizontal and flush with the motherboard surface. You may hear or feel a small click as the connector fully engages—this is normal. Secure the SSD with the small Phillips screw that was already in the slot (some boards come with a pre-installed screw; if not, use the screw that came with your SSD or motherboard).
Step 7: Reinstall the M.2 Heatsink
If your board has an M.2 heatsink, carefully reinstall it over the newly inserted SSD. Ensure the thermal pad on the heatsink’s underside makes full contact with the SSD’s top surface. Secure the heatsink with the same Phillips screw you removed in Step 4. Do not over-tighten—snug is sufficient. Some boards include thermal pads with the heatsink; if your SSD already has a thermal pad pre-installed, you may need to remove it before applying the heatsink’s pad (check your SSD manual to avoid double-padding).
Step 8: Close Your Case and Power On
Close your case side panel and resecure the screws. Plug in the power cable and power on your system. Your PC should boot normally. If Windows boots, your M.2 SSD is likely installed correctly. Verify recognition in Step 9 below.
Step-by-Step: Installing a 2.5-Inch SATA SSD
Step 1: Prepare Your Case
Power off completely, unplug the PSU, and press the power button for 5 seconds. Open the case side panel as described above. Locate a 2.5-inch drive bay in your case. If your case doesn’t have a dedicated 2.5-inch bay, you’ll need a 3.5″ to 2.5″ adapter bracket to mount the SSD in a 3.5-inch bay.
Step 2: Mount the SSD in the Bay or Adapter
If using a dedicated 2.5-inch bay, slide the SSD into the bay until the screw holes on the SSD align with the holes in the bay. Secure with four Phillips screws (two on each side). If using a 3.5″ to 2.5″ adapter bracket, first install the SSD into the bracket (slide it in and secure with four screws), then install the bracket with SSD into the 3.5-inch bay.
Step 3: Connect the SATA Data Cable
Locate the SATA data ports on your motherboard. These are typically color-coded and labeled SATA0, SATA1, SATA2, SATA3, etc. Connect one end of a SATA data cable to a SATA port on the motherboard (start with SATA0 or SATA1). Route the cable carefully along the case interior to avoid sharp edges and fan blades. Connect the other end to the SATA port on the back of the SSD. The connector is keyed and only fits one way—do not force it.
Step 4: Connect the SATA Power Cable
Locate the SATA power connector(s) on your PSU. These are L-shaped connectors with multiple pins. Route a SATA power cable from the PSU to the back of the SSD, connecting to the SATA power port (separate from the data port). Again, the connector is keyed and only fits one way. Ensure the connection is snug but not forced.
Step 5: Secure Cables and Close the Case
Route cables neatly along the case interior or through cable management holes to avoid obstructing airflow or fan blades. Close the case side panel and resecure screws. Plug in the power cable and power on your system.
M.2 Slot Sharing: What You Need to Know
On some motherboards—particularly budget and mid-range models—certain M.2 slots share PCIe lanes with SATA ports. This means populating a specific M.2 slot may disable one or more SATA ports automatically. For example, populating M.2_2 might disable SATA3 and SATA4.
How to check: Consult your motherboard manual. Look for a table or diagram under “M.2” or “Storage” that notes any bandwidth sharing. Most modern boards (ZZ90 Intel, X870 AMD, and newer) have dedicated PCIe lanes per M.2 slot and do not have this limitation. Older boards (B450, Z390, etc.) may have sharing.
What to do: If you’re installing an M.2 SSD and using SATA drives, check your manual before installation. If your target M.2 slot disables SATA ports you’re using, populate a different M.2 slot instead. If you only plan to use M.2 NVMe drives (no SATA drives), slot sharing is irrelevant.
How to Initialize Your New SSD in Windows
Once your SSD is installed and your system boots, Windows may not immediately recognize the new drive. You’ll need to initialize and format it.
Initialize the SSD
Right-click This PC or My Computer and select Manage. In Device Manager, click Disk Management. You’ll see all connected drives. Find your new SSD (it will likely be labeled “Disk 1,” “Disk 2,” etc., and show as “Unallocated” space). Right-click the unallocated disk and select Initialize Disk. A dialog will ask whether to use MBR or GPT partition style. For modern systems, select GPT (GUID Partition Table)—it supports drives larger than 2TB and is the standard for Windows 11. For older systems, MBR is acceptable, but GPT is preferred. Click OK.
Create a Partition and Format
After initialization, the disk will show as “Unallocated.” Right-click the unallocated space and select New Simple Volume. A wizard will open. Accept the defaults (it will create a volume using all available space) and proceed. When asked to format the volume, select NTFS as the file system and give your drive a name (e.g., “SSD Storage”). Click OK. Windows will format the drive, which takes a few seconds to a minute depending on size.
Verify in File Explorer
Once formatting completes, your new SSD will appear in File Explorer under “This PC” with the name you assigned. It’s now ready to use for storing files, games, or applications.
How to Clone Your OS to Your New SSD
If you’re upgrading your main drive and want to transfer Windows and all your applications to the new SSD without a fresh install, you can clone your current drive. This preserves your OS, programs, and settings.
Popular cloning tools: Acronis True Image, EaseUS Todo Backup, or Macrium Reflect all offer free or paid versions with cloning functionality. Download one of these tools, create a bootable USB drive (the tool will guide you), boot from the USB, and follow the on-screen prompts to clone your current drive to the new SSD. This process can take 30 minutes to several hours depending on how much data you have.
For step-by-step cloning instructions, consult your cloning tool’s documentation or our related SSD compatibility and setup guides (linked below).
Troubleshooting SSD Installation Issues
New SSD Not Showing in BIOS
If your new M.2 SSD doesn’t appear in BIOS, the most common cause is improper seating. Power off, open the case, and reseat the SSD. Ensure it’s at a 30-degree angle initially, then pressed flat. The connector should be fully inserted. Reseat and power on again. If the drive still doesn’t appear, try a different M.2 slot (if your board has multiple slots). If it appears in the second slot, the first slot may be faulty.
M.2 SSD Detected but Not Showing in Windows
If BIOS recognizes the drive but Windows doesn’t show it, the SSD needs initialization and formatting. Follow the “How to Initialize Your New SSD in Windows” section above. After initialization and formatting in Disk Management, the drive will appear in File Explorer.
SATA SSD Not Detected
If a SATA SSD doesn’t appear in BIOS or Windows, check the following: (1) Verify that both the SATA data cable and SATA power cable are securely connected to the SSD and motherboard/PSU. (2) Try a different SATA port on the motherboard—one of the ports may be faulty. (3) If the SSD works in a different port, the original port is defective; contact your motherboard manufacturer. (4) If the drive doesn’t work in any port, the SSD itself may be faulty—try the SSD in another PC if possible, or contact the SSD manufacturer.
M.2 Slot Disables SATA Ports After Installation
If you installed an M.2 SSD and your SATA drives stopped working, this is likely M.2 slot sharing (as discussed above). Check your motherboard manual to see which SATA ports are affected by your M.2 slot. Move your SATA cables to a different SATA port (one not affected by the M.2 slot), or use a different M.2 slot that doesn’t disable your SATA ports. After moving cables, reboot and verify the SATA drives are recognized.
SSD Running Slower Than Expected
If your M.2 NVMe SSD is running at slower speeds than advertised (e.g., a Gen4 drive performing like a Gen3 drive), check the following: (1) Verify that the M.2 slot supports the correct PCIe generation. If you installed a Gen4 SSD in a Gen3 slot, it will run at Gen3 speeds. (2) Update your motherboard BIOS to the latest version—BIOS updates often improve drive compatibility and speed. (3) Check drive temperatures using tools like CrystalDiskInfo—if the drive is overheating and throttling, ensure the heatsink is properly installed and making full thermal pad contact.
Recommended Desktop SSDs for 2026
Here are reliable, high-performance SSDs suitable for most desktop systems. All links are to Amazon UK with our affiliate tag.
| Product | Capacity | Interface | Speed / Type | Best For | Amazon UK |
|---|---|---|---|---|---|
| Samsung 990 Pro | 1TB / 2TB / 4TB | M.2 NVMe | PCIe Gen4 (7,100 MB/s) | Gaming, content creation, high-performance | View on Amazon UK |
| WD Black SN850X | 1TB / 2TB / 4TB | M.2 NVMe | PCIe Gen4 (7,100 MB/s) | Gaming, workstation, balanced performance | View on Amazon UK |
| Kingston NV2 | 1TB / 2TB | M.2 NVMe | PCIe Gen3 (2,400 MB/s) | Budget NVMe, secondary storage | View on Amazon UK |
| Crucial T500 | 1TB / 2TB / 4TB | M.2 NVMe | PCIe Gen4 (7,100 MB/s) | Reliable mid-range Gen4, cost-effective | View on Amazon UK |
| SK hynix P41 Platinum | 1TB / 2TB | M.2 NVMe | PCIe Gen4 (7,100 MB/s) | High performance, excellent reliability | View on Amazon UK |
| Sabrent Rocket 4 Plus | 1TB / 2TB | M.2 NVMe | PCIe Gen4 (7,000 MB/s) | Content creation, budget enthusiast | View on Amazon UK |
| Samsung 870 EVO | 1TB / 2TB / 4TB | 2.5″ SATA | 560 MB/s (read) | Secondary storage, 2.5″ SATA upgrade | View on Amazon UK |
| Crucial MX500 | 1TB / 2TB | 2.5″ SATA | 560 MB/s (read) | Budget SATA SSD, reliable | View on Amazon UK |
| Intel 760p | 1TB / 2TB | M.2 NVMe | PCIe Gen3 (3,400 MB/s) | Budget entry-level NVMe | View on Amazon UK |
| WD Blue SN550 | 1TB / 2TB | M.2 NVMe | PCIe Gen3 (2,400 MB/s) | Reliable budget NVMe option | View on Amazon UK |
Frequently Asked Questions
Is M.2 NVMe Faster Than 2.5-Inch SATA SSD?
Yes, significantly. An M.2 PCIe Gen4 NVMe drive reaches speeds of 7,000+ MB/s, while a 2.5-inch SATA SSD maxes out around 560 MB/s. For everyday use like web browsing and office work, you won’t notice much difference between them. But for gaming, file transfers, and video editing, Gen4 NVMe is dramatically faster. If you’re buying a new SSD in 2026, get NVMe—SATA is legacy technology now.
Can I Use Both M.2 and SATA Drives in My System?
Yes, most systems support both. You can have an M.2 NVMe drive as your primary drive and one or more 2.5-inch SATA SSDs or hard drives as secondary storage. However, check your motherboard manual for any M.2 slot sharing that may disable SATA ports. Most modern boards don’t have this issue, but it’s worth confirming.
Do I Need a Heatsink on My M.2 SSD?
Modern high-performance NVMe drives (Gen4 and Gen5) benefit from heatsinks or thermal pads to dissipate heat and prevent throttling. Most boards come with M.2 heatsinks, and most SSDs come with thermal pads. If your board doesn’t have a heatsink and your SSD doesn’t have a thermal pad, you may experience thermal throttling under sustained high loads (like large file transfers or gaming). Install a heatsink or thermal pad for peace of mind. Budget options are available on Amazon for around £5–15.
Can I Install an SSD While My Computer Is Running?
No. Always power off completely, unplug the PSU, and wait a moment before handling internal components. Installing a drive in a powered system risks electrostatic discharge and hardware damage. Modern components are reasonably robust, but ESD can cause silent failures that appear days or weeks later.
How Do I Know If My SSD Is Working at Full Speed?
Use a speed test tool like CrystalDiskInfo, AS SSD Benchmark, or the built-in Windows Storage Settings to check your SSD’s real-world performance. For an M.2 Gen4 drive, you should see read speeds of 5,000+ MB/s. For Gen3, expect 3,000+ MB/s. If your speeds are lower, check that the SSD is in a Gen4 slot (not a Gen3 slot) and update your BIOS to the latest version.
Is Cloning Better Than Fresh Windows Install?
Both are valid. Cloning preserves your current OS configuration, programs, and settings—useful if you want to transfer everything as-is. A fresh install is cleaner and eliminates accumulated junk files, but requires reinstalling all programs. Choose cloning if your current system is healthy; choose fresh install if it’s cluttered or problematic.
What PCIe Generation SSD Should I Buy?
For a new system in 2026: If you have a Gen5-capable board (very high-end), a Gen5 SSD offers future-proofing but comes at a premium—real-world performance gains over Gen4 are minimal. For most users, a Gen4 drive is the sweet spot—excellent speed, reasonable price, and widely compatible. For budget builds or secondary storage, Gen3 is still acceptable, but Gen4 prices have dropped enough that there’s little reason to buy Gen3 anymore.
Do I Need to Update My BIOS Before Installing an SSD?
Not always, but updating is a good idea if you’re installing a brand-new SSD model or updating your motherboard. Check your motherboard manufacturer’s website for the latest BIOS version and release notes. If the notes mention improved SSD compatibility or speed support, update before installation. BIOS updates are usually simple and take 5–10 minutes.
Related Guides & Tools
Ensure your new SSD and all components work together seamlessly. Use our Laptop & Desktop Compatibility Checker to verify SSD, RAM, and charger compatibility across 100+ desktop and laptop models.
For more comprehensive guides, check out:
- Laptop SSD Compatibility Guide (NVMe, M.2, SATA) — Complete compatibility matrix for all SSD types and form factors across Intel and AMD platforms.
- Laptop RAM Compatibility Guide (DDR4, DDR5, LPDDR5) — Pair your new SSD with compatible RAM for a complete desktop upgrade.
- Laptop Charger Compatibility Guide — If you’re working with laptops, ensure charging compatibility.
- Laptop Docking Station Compatibility Guide — For multi-monitor setups and external storage.
Affiliate Disclosure
This page contains Amazon UK affiliate links. We earn a small commission if you purchase through these links at no additional cost to you. This helps support our site and allows us to continue creating free guides and compatibility tools. We only recommend products we believe are reliable and offer good value.