The Lenovo Legion 5 and Legion 5 Pro are gaming workhorses designed for performance enthusiasts. Upgrading the SSD is straightforward — the bottom panel opens with Phillips screws, and you’ll find two M.2 SSD slots right on the motherboard. This guide covers both models.
Legion machines are gaming-focused, and Lenovo made sure upgrades are easy. You’ll typically find one SSD already installed (on the first M.2 slot), with the second slot either occupied or empty. Adding or replacing SSDs is a 15-minute job that transforms your gaming experience.
What You’ll Need
Gather these tools and components. Legion is straightforward to work on with minimal special tools.
| Item | Purpose | Where to Buy |
|---|---|---|
| Phillips Screwdriver (#0 or #1) | Remove bottom panel and SSD retention screws | Amazon UK |
| Anti-Static Wristband | Prevent static damage to M.2 SSDs | Amazon UK |
| M.2 2280 NVMe SSD (1TB or 2TB) | Storage upgrade (WD Black SN850X or Samsung 990 EVO) | Amazon UK |
| Thermal Pad or Heatsink Pad (optional) | Thermal interface if the new SSD doesn’t come with one pre-applied | Amazon UK |
| Plastic Spudger | Safely pry open the bottom panel without scratching | Amazon UK |
Before You Start
Back up all data if you’re replacing the drive that holds your Windows installation. Back up to cloud storage or an external drive.
Power off and unplug the Legion completely. These are powerful gaming machines with fast GPUs and SSDs — they generate heat. Wait 5 minutes for the system to cool before opening.
Disconnect all cables — power, USB, Ethernet, headphones. The Legion is durable, but disconnecting power is always safest.
Discharge static electricity by wearing your wristband (grounded to a bare metal part of the chassis) before touching SSDs.
Note the SSD heatsink. Lenovo Legion machines often have a heatspreader or heatsink on the M.2 slots. You’ll need to remove this to access the SSD. This is simple but worth noting.
Step-by-Step Guide
Step 1: Remove the Bottom Panel
Flip the Legion over. You’ll see the bottom panel held by approximately 8–12 Phillips screws. Some may be longer than others if they’re securing heatsinks or fans. Remove all screws and set them aside on a clean surface, keeping track of which came from where (though generally Phillips screws are interchangeable for the panel).
Once all screws are removed, use your plastic spudger to gently pry up the edges of the bottom panel. The panel may be held by clips around the perimeter — work your way around until the panel pops off. Lift it away and set it on a soft surface.
Step 2: Locate the M.2 SSD Slots
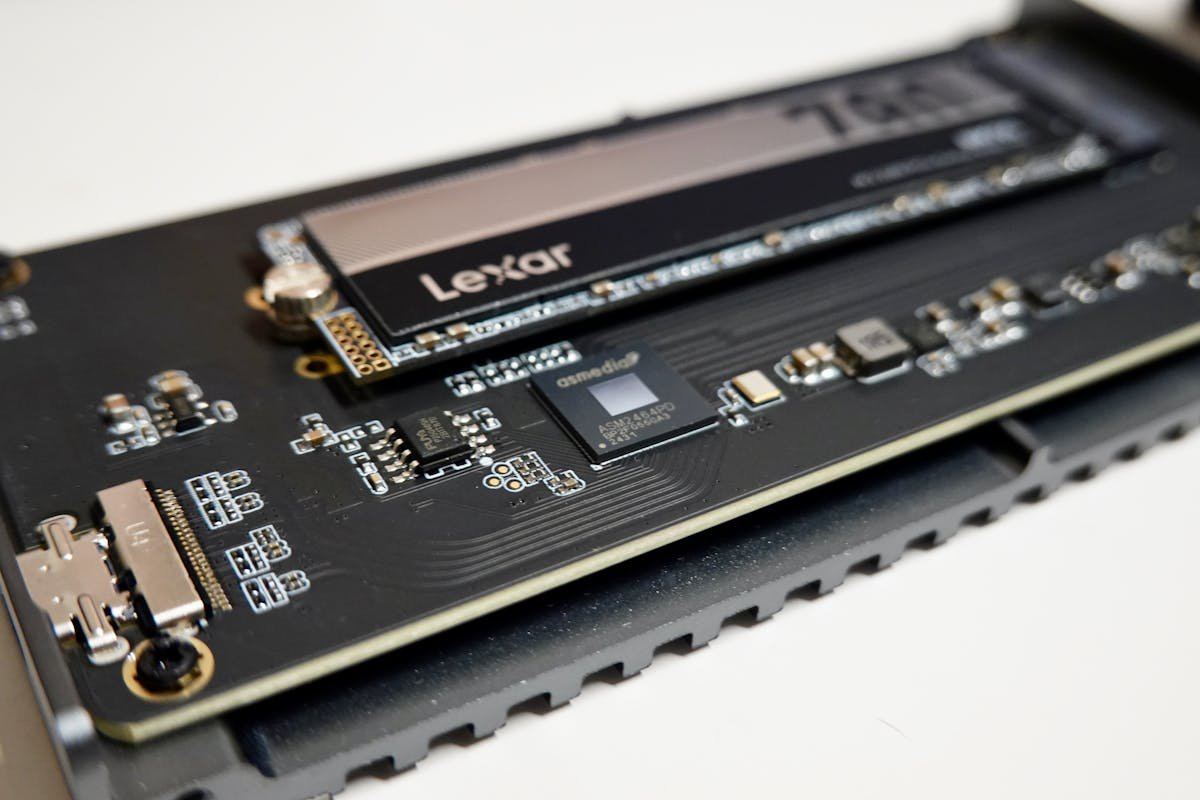
With the panel off, locate the M.2 SSD slots. On Legion 5 and 5 Pro, there are typically two M.2 2280 slots, usually located in the centre or towards the back of the motherboard. They’re often covered by heatsinks or heatspreaders — these look like small metal or black plastic covers.
Check how many slots are occupied: one, two, or none (unlikely). You can see the SSD(s) protruding beneath the heatsinks.
Step 3: Remove the Heatsink from the Target Slot
Before accessing the SSD, you’ll need to remove the heatsink. There are usually 1–2 Phillips screws holding it in place. Locate these screws and remove them. The heatsink may have a thermal pad attached to its underside — be gentle when removing it, as these pads are single-use and can stick.
Once the screws are out, lift the heatsink straight up. If it sticks due to the thermal pad, use your plastic spudger to gently pry a corner free. Don’t yank it — the thermal pad may tear, and you’ll want to save it for the new SSD if it’s still in good condition.
Step 4: Remove the Old SSD
With the heatsink off, you’ll see the M.2 SSD angled at about 30 degrees into the slot. A single Phillips screw at the far end (opposite the connector) holds it in place. Remove this screw.
Gently push the SSD down (away from you, along the slot angle) and it will pop up at the connector end. Grasp it by the edge and pull straight out. Check if the thermal pad came off with the drive. If it’s intact and clean, you can reuse it. If it’s damaged or came off the heatsink, you’ll need a fresh pad for the new SSD.
Step 5: Inspect and Prepare the Thermal Interface
Before installing the new SSD, check the thermal pad situation:
Option A: Reuse the existing pad — If the pad is on the heatsink, intact, and not creased, you can reuse it. Just ensure it makes full contact with the new SSD’s top surface.
Option B: Fresh pad on the new SSD — If the pad is damaged or came off with the old drive, apply a new thermal pad to the top of your new SSD before installing it. Most M.2 SSDs come with a pre-applied thermal pad, so check your new drive first.
Option C: No pad replacement needed — If your new SSD comes with a thermal pad pre-applied and the heatsink pad is in good condition, you’re all set.
Step 6: Install the New SSD
Hold your new M.2 SSD at a 30-degree angle with the connector pointing down into the slot. Align the notch on the SSD with the key in the slot (they only fit one way). Slide it smoothly into the slot until the connector is fully seated.
Once seated, press the far end of the SSD down gently and install the Phillips screw that holds it at the angled position. Tighten firmly but not hard — you’re securing a thin circuit board, not a heavy component.
Step 7: Reinstall the Heatsink
Carefully position the heatsink back over the new SSD. Ensure the thermal pad (on the underside of the heatsink or on the top of the SSD) makes full contact with the SSD. The heatsink should sit flat.
Reinstall the Phillips screw(s) holding the heatsink. Tighten firmly — good thermal contact depends on the heatsink being seated properly.
Step 8: Reinstall the Bottom Panel
Position the bottom panel back onto the Legion, starting from the back edge and working forward. Ensure all clips align. Once positioned, flip the laptop and reinstall all Phillips screws in their original positions. Tighten firmly but not excessively.
Verifying the Upgrade
Power on your Legion. Windows should boot normally. Verify the new SSD once at the desktop:
SSD Detection in Windows: Open File Explorer and look at “This PC”. Your new SSD should appear with its full capacity listed. If it shows “Unknown” or “Uninitialized”, right-click it in Disk Management and initialize it, then create a Simple Volume.
Speed Check: Open Task Manager (Ctrl+Shift+Esc) and go to the Performance tab. Click on Storage and look at your SSD speeds. You should see respectable read/write speeds (typically 3,000–7,000 MB/s for NVMe).
BIOS Check: Restart and press F2 during boot to enter Legion BIOS. The system info page should list your new storage configuration.
Gaming Performance: Boot up a game. You should notice significantly faster load times compared to a SATA SSD (if that’s what you had before).
Troubleshooting
SSD not detected in BIOS or Windows — Power off and reseat the drive. Check that the retention screw is tight. Ensure the thermal pad isn’t blocking the connector — it should contact the top surface of the SSD, not the connector pins. Power off, reseat, and try again.
Laptop won’t boot after SSD upgrade — If this is your primary drive (where Windows was installed), it’s blank. You’ll need to install Windows fresh using a Windows installation USB, or clone your old OS to the new drive beforehand.
Throttling or thermal shutdown — The SSD heatsink may not be making proper thermal contact. Power off, remove the heatsink, and check the thermal pad. If it’s creased, torn, or not making full contact, replace it with a fresh pad (5W/mK or higher for gaming SSDs).
Partial SSD capacity recognized — New SSDs sometimes report lower capacity in Windows. Update the SSD firmware from the manufacturer’s support page. This usually resolves the issue.
Slow performance despite upgrade — Confirm the SSD is detected as NVMe (not SATA) in Task Manager. If you’re seeing slow speeds (under 1,000 MB/s read), the drive may not be fully seated. Power off and reseat the SSD fully.
Recommended Upgrades
For Lenovo Legion 5 and 5 Pro, invest in performance-tier NVMe SSDs. Gaming workloads benefit from fast storage.
Best All-Around SSD: Samsung 990 EVO (1TB or 2TB) — Fast, reliable, excellent warranty. £60–120.
Best Performance SSD: WD Black SN850X (1TB or 2TB) — Faster sustained speeds, great for gaming and creative work. £50–110.
For Legion 5/5 Pro, 1TB is sufficient for OS + a rotating set of games. 2TB is better if you keep a large game library installed. Consider adding a second M.2 SSD to the second slot for game library segregation — this improves performance by keeping OS and games on separate drives.
FAQ
Can I use both M.2 slots on the Legion 5?
Yes. Legion 5 and 5 Pro have two M.2 2280 slots. You can install SSDs in both slots, each with its own heatsink. This is great for separating your OS (on one drive) from your games (on a second) for better performance and organization.
What’s the maximum SSD size the Legion supports?
Technically, any M.2 2280 NVMe SSD will fit physically. However, Lenovo’s BIOS may have a limit (typically 2TB or 4TB depending on the model). Check your BIOS version and update if needed — newer BIOS often supports larger SSDs.
Does the Legion 5 SSD come with thermal paste or a thermal pad?
Most Legion models use thermal pads on the M.2 heatsinks, not thermal paste. New SSDs often come with a thermal pad pre-applied. If not, buy a thermal pad separately (5W/mK is standard). Never use thermal paste on an M.2 SSD — use pads only.
Will upgrading the SSD void my warranty?
No. Lenovo lists the M.2 SSD as user-replaceable. Upgrading won’t void your warranty. However, damage caused during the upgrade is your responsibility.
How much faster is an NVMe SSD compared to SATA?
NVMe reads/writes at 3,000–7,000 MB/s depending on the drive. SATA maxes out at ~550 MB/s. In real gaming, this means 2–3x faster game load times. In general use, NVMe feels significantly snappier than SATA.
Can I clone Windows to the new SSD, or do I need a fresh install?
You can clone (faster, everything transfers as-is) or do a fresh install (cleaner, but takes longer). Most users prefer cloning. Use a tool like EaseUS Todo Backup to clone your old drive to the new one before opening the Legion.
Recommended Products
These are the products we recommend based on this guide. All links go to Amazon UK where you can check current prices and availability.
| Product | Why We Recommend It | Amazon UK |
|---|---|---|
| Samsung 990 Pro 2TB NVMe M.2 2280 | Fastest consumer NVMe — ideal for gaming & editing | View on Amazon UK |
| WD Black SN850X 2TB NVMe | Excellent Gen4 speed with heatsink option | View on Amazon UK |
| Crucial P5 Plus 1TB NVMe | Great value Gen4 SSD | View on Amazon UK |
| Kingston NV2 1TB NVMe | Budget-friendly with solid reliability | View on Amazon UK |
| Thermal Grizzly Kryonaut | Best thermal paste for laptop repasting | View on Amazon UK |
| Noctua NT-H1 | Easy-to-apply, excellent for beginners | View on Amazon UK |
| Arctic MX-6 | Budget thermal paste with good performance | View on Amazon UK |
| IETS GT500 Laptop Cooling Pad | Powerful external cooling for gaming laptops | View on Amazon UK |
Prices and availability may vary. As an Amazon Associate, we earn from qualifying purchases.
Related Lenovo Upgrade Guides
- Lenovo Battery Replacement: ThinkPad, IdeaPad & Legion Step-by-Step
- Best RAM for Lenovo ThinkPad in 2026
- Lenovo ThinkSystem SR665 V3 RAM & SSD Upgrade Guide (2023)
- Lenovo ThinkSystem SR665 RAM & SSD Upgrade Guide (2020)
- Lenovo ThinkSystem SR645 RAM & SSD Upgrade Guide (2020)
- Lenovo Upgrade Guide
Not sure what fits? Use our free Compatibility Checker covering 3,195+ models.
Helpful Guides
Recommended NVMe SSDs
Western Digital
Western Digital Black WD_BLACK™ SN850X NVMe™ SSD POWERED BY SANDISK 2
£390.97
View Deal