RAM Not Recognised After Upgrade — Complete Troubleshooting Guide
You’ve installed new RAM into your laptop, restarted it, and checked System Properties — but Windows is showing the old amount of memory, or not showing the new module at all. This is frustrating, but it’s almost never a sign that the hardware is damaged. We’ll walk you through diagnosing and fixing this step by step.
Nine times out of ten, “RAM not detected” issues come down to physical seating, BIOS settings, or a simple compatibility mismatch. By the end of this guide, you’ll know exactly what the problem is and how to solve it.
Step 1: Check the Physical Seating of Your RAM
This is the most common cause of undetected RAM. RAM modules need to be seated firmly in their slot for the system to recognise them.
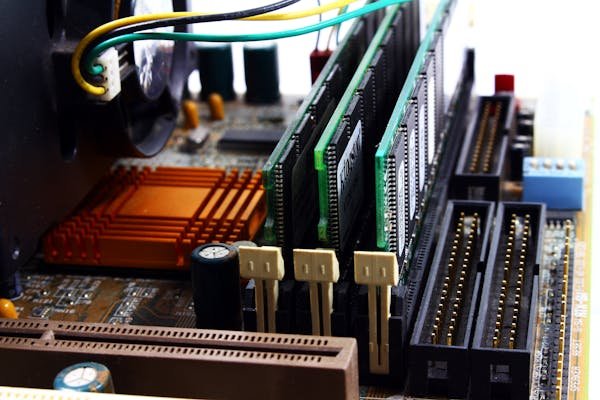
What Proper Seating Looks Like
- The RAM module sits flush and level in the slot — no gaps between the module and the slot walls.
- The metal clips at each end of the slot have clicked inward to grip the module (you’ll hear two distinct clicks, one at each end).
- The module is inserted at a slight angle first, then pressed down level.
How to Reseat Your RAM
- Power off your laptop completely and unplug it.
- If your laptop has a removable battery, remove it (or hold the power button for 10 seconds after unplugging to discharge residual power).
- Open your laptop’s access panel (usually held by 1–4 screws).
- Locate the RAM slots — they’re small, rectangular slots near the centre of the motherboard.
- If there’s existing RAM, eject it by pressing the clips on both ends outward. The module will pop up at an angle.
- For your new RAM, align the notch in the module with the raised ridge in the slot (this prevents incorrect insertion).
- Press the RAM down at an angle (about 45 degrees) until the clips snap inward. Then press down firmly to make it level — you should feel two clicks.
- Close the laptop, plug it in, and restart.
- Check System Properties (Windows) or About This Mac to verify the new memory is detected.
If Windows now shows the new amount of RAM, congratulations — you’ve fixed it. If not, proceed to Step 2.
Step 2: Check the Slot Order (Dual-Channel Mode)
Many laptops with two RAM slots require them to be filled in a specific order for both modules to be recognised. This is called “dual-channel mode,” and it matters.
Common Slot Order Rules
- Slot 1 (closest to the CPU) first — Most laptops recognise single modules in Slot 1 (marked DIMM 1 or SO-DIMM 1). Try installing your new RAM here first.
- Both slots should use matching RAM — For optimal performance and recognition, use identical modules (same speed, capacity, and type).
- If you’re mixing old and new RAM — Try putting the old module in Slot 1 and the new one in Slot 2, then swap them to test.
How to Test Slot Order
- Shut down and unplug your laptop.
- Remove the new RAM module.
- Restart your laptop with only the old module. Verify it boots and shows the original memory amount.
- Shut down, unplug, and install the new module in Slot 1 (if it wasn’t already there).
- Restart and check if the new module is now detected.
- If Slot 1 didn’t work, shut down, move the new module to Slot 2, and test again.
- If one slot works but not the other, that slot may be faulty (rare, but it happens).
Once you’ve identified which slot works, you can decide whether to use one module or test whether dual-channel mode works with both installed.
Step 3: Check Your BIOS Settings
Most modern laptops detect new RAM automatically, but some require BIOS settings to be enabled or updated. This is especially common with DDR5 RAM on older systems.
Access Your BIOS
- Restart your laptop and immediately press the BIOS key. This varies by manufacturer:
- Dell: F2 or Del during startup
- HP: F10 or Esc, then F10
- Lenovo: F1 or Fn+F1
- ASUS: F2 or Del
- Acer: F2 or Del
- You’ll enter a blue or grey menu with navigation options (usually arrow keys).
- Look for a “Main” or “System Information” tab that shows detected memory.
What to Check in BIOS
- Installed Memory — Does BIOS show the full amount of new RAM? If yes, the hardware is fine and the issue is likely with Windows (see below).
- Memory Speed — If you installed faster RAM (e.g., 3600MHz), BIOS might be running it at a slower default speed (e.g., 3200MHz). This is normal and won’t prevent detection.
- XMP/DOCP Profile — For gaming or high-performance laptops, you can enable XMP (Intel) or DOCP (AMD) to run RAM at its rated speed. This is optional but can improve performance.
- Channel Mode — Look for a setting like “Dual-Channel Mode” or “Memory Configuration.” Make sure it’s set to “Auto” or “Enabled.”
Update Your BIOS (If Needed)
If BIOS doesn’t show your new RAM, your laptop’s BIOS may be too old to recognise it. This is common when upgrading to DDR5 or much faster DDR4.
- Visit your laptop manufacturer’s support site (Dell Support, HP Support, etc.).
- Search for your laptop model and download the latest BIOS update.
- Follow the manufacturer’s instructions for flashing the BIOS (this process varies widely).
- Restart and check BIOS again to see if the new RAM is now detected.
Caution: Don’t interrupt a BIOS update. It’s a delicate process, and interrupting it can make your laptop unbootable. Only update if your battery is fully charged and your laptop is on a stable power supply.
Step 4: Verify Compatibility — DDR4 vs DDR5, Speeds & Maximum Capacity
RAM that’s physically incompatible will sit in the slot but won’t be recognised by the system. This is usually obvious, but it’s worth checking.
DDR4 vs DDR5 — The Most Common Mistake
- DDR4 — The notch (key) is slightly offset towards one side of the module.
- DDR5 — The notch is in a different position (more towards the centre).
If you try to install DDR5 RAM in a DDR4 slot, it won’t fit. If you somehow force it, it won’t be detected. Always verify your laptop supports DDR5 before purchasing. See our Laptop RAM Compatibility Guide to confirm your model’s memory type and maximum capacity.
Speed Compatibility
- Mismatch in speed — Installing 3600MHz RAM in a laptop that only supports 3200MHz won’t damage anything. The RAM will run at 3200MHz (the slower speed) automatically. Both modules will be detected and recognised.
- Maximum capacity limits — Some older laptops have firmware limits on how much RAM they’ll recognise. If you installed 32GB in a system with a 16GB limit, only 16GB will show up. Check your laptop’s specifications to confirm its maximum supported memory capacity.
Step 5: Test Individual RAM Modules & Check for Faults
If you’ve tried reseating, checked BIOS, verified compatibility, and the new RAM still isn’t being detected, one of the modules may be faulty.
How to Test Individual Modules
- Power down completely and unplug your laptop.
- Remove all RAM modules.
- Install only the old RAM module (in Slot 1 first).
- Power on and verify it boots and shows the correct amount of memory in System Properties.
- Power down again and swap it for only the new RAM module.
- Power on and check if the new module is detected.
- If the new module isn’t detected, try installing it in the other slot (Slot 2).
If the new RAM works in one slot but not the other, that slot is faulty and may need professional repair. If the new module isn’t detected in either slot, the module itself is likely defective.
Using MemTest86 to Diagnose Faulty RAM
If you suspect a module is defective, MemTest86 is a comprehensive RAM diagnostic tool that doesn’t require Windows to run. You can boot from a USB drive and run memory tests without booting your operating system.
- Download MemTest86 from memtest86.com (the free version is sufficient).
- Create a bootable USB drive using the MemTest86 ISO file.
- Insert the USB drive into your laptop and restart.
- Boot from the USB drive (usually by pressing F12, F2, or Esc during startup — varies by manufacturer).
- MemTest86 will run automatically and test your RAM. A faulty module will show errors within a few minutes.
- If errors appear, the module is defective and should be returned under warranty or replaced.
Note: MemTest86 can take 1–2 hours to run a full test pass. For a quick pass to identify problems, let it run for at least 10 minutes.
Step 6: If BIOS Detects the RAM But Windows Doesn’t — Update Windows
In rare cases, BIOS will detect your new RAM, but Windows won’t show it in System Properties or Device Manager. This usually means Windows needs an update.
- Press Windows Key + I to open Settings.
- Navigate to Update & Security > Check for updates.
- Install any available updates and restart your laptop.
- After restarting, check System Properties again to see if Windows now detects the new RAM.
In even rarer cases, a chipset driver update from your laptop manufacturer may be needed. Visit your manufacturer’s support page, search for your model, and download any available chipset or BIOS drivers.
Troubleshooting Summary
| Symptom | Most Likely Cause | Fix |
| New RAM not showing up at all | Not seated properly | Reseat the module firmly until you hear/feel two clicks |
| Only part of the new RAM showing | Partial seating, wrong slot, or slot failure | Reseat; try the other slot |
| BIOS doesn’t detect RAM | Incompatible type, faulty module, or BIOS too old | Verify DDR4/DDR5 compatibility; update BIOS |
| BIOS detects it, Windows doesn’t | Windows or chipset driver out of date | Update Windows and chipset drivers |
| RAM detected but computer crashes | Faulty module or incompatible speed | Run MemTest86; test individual modules |
| Works in one slot, not the other | Bad RAM slot | Use the working slot; contact manufacturer for repair |
When to Get Professional Help
Contact a technician if:
- You’ve followed all troubleshooting steps and the RAM still isn’t detected
- The RAM is detected but your laptop won’t boot or crashes constantly
- Your laptop is under warranty and you don’t want to risk opening it yourself
- You suspect a RAM slot on the motherboard is faulty
Related Guides
- Laptop Upgrade Troubleshooting Guide — Comprehensive troubleshooting for all upgrade issues
- Laptop RAM Compatibility Guide — Check DDR4/DDR5 support and maximum capacity for your model
- Laptop SSD Compatibility Guide — Ensure you’re buying the right SSD for your laptop
M Compatibility Guide to check what your model supports.
RAM Speed Compatibility
Most laptops support RAM speeds from 2133MHz to 3600MHz without issue. However, some older systems max out at 2933MHz or 3200MHz. Installing faster RAM is fine — your laptop will simply run it at the maximum speed it supports.
Exception: Some gaming laptops list minimum supported speeds (e.g., 2666MHz minimum). Installing slower RAM may cause detection issues or instability.
Check your laptop’s specs on the manufacturer’s website to see the supported speed range, or consult our RAM guide.
Maximum Capacity
Most modern laptops support up to 32GB or 64GB per slot. However, some older models max out at 8GB or 16GB. Installing 32GB of RAM in a laptop that only supports 16GB won’t be detected — the system will only recognise up to its maximum.
Example: If your laptop supports a maximum of 16GB total, installing two 16GB modules won’t work. You’d need to use 8GB modules instead.
Check your laptop’s maximum supported capacity in the specifications on your manufacturer’s support page.
Step 5: Windows Only Shows Partial RAM (e.g., 4GB Instead of 8GB)
If BIOS shows the full amount of RAM, but Windows is only showing part of it, the issue is usually one of these:
Cause 1: You’re Running 32-Bit Windows
Windows 32-bit cannot recognise more than 4GB of RAM, regardless of how much you install. If you see less than 4GB available even with 8GB installed, you’re likely on 32-bit.
Check your Windows version:
- Right-click “This PC” or “My Computer” and select Properties.
- Look for “System type” — it will say either “64-bit” or “32-bit.”
If you’re on 32-bit, upgrade to 64-bit Windows. You’ll need a Windows installation disc or USB, and the upgrade process will vary by version. Contact Microsoft Support or your laptop manufacturer for specific steps.
Cause 2: RAM Not Fully Seated
Even if the system boots and shows partial RAM, the module may not be fully seated. Reseat both modules following Step 1 above, making sure you hear two distinct clicks from the retention clips.
Cause 3: One RAM Slot Has Failed
If you installed one 8GB module and see only 4GB, one of your RAM slots may be faulty. Test by moving the module to the other slot and restarting. If you see 8GB in Slot 2 but only 4GB in Slot 1, Slot 1 has failed.
Contact your laptop manufacturer for warranty repair, or accept using only the working slot (you’ll have reduced total capacity).
Step 6: Test Individual RAM Modules
If you have two modules and one isn’t being recognised, it’s time to isolate the problem.
Test Each Module Separately
- Power down and unplug your laptop.
- Remove both RAM modules.
- Install only your new module in Slot 1.
- Restart and check System Properties. How much RAM does it show?
- If it shows the new module’s capacity (e.g., 8GB), the module is fine.
- If it shows 0GB or the system won’t boot, the module or Slot 1 is faulty.
- Power down and move the new module to Slot 2. Restart and check again.
- If Slot 2 shows the new module but Slot 1 doesn’t, your Slot 1 has failed.
Advanced Testing with MemTest86
If a module is recognised but you’re experiencing random crashes or blue screens, the RAM itself may be faulty (it passes basic detection but fails under load).
MemTest86 Pro is a free diagnostic tool that runs comprehensive RAM tests without needing Windows to be running. Create a bootable USB stick and run the full test suite (allow at least 2–3 hours for a thorough check).
If MemTest86 finds errors, the module is genuinely faulty and should be replaced under warranty.
Step 7: Mac-Specific RAM Issues
If you have a MacBook, RAM troubleshooting is slightly different.
Check Detected Memory on Mac
- Click the Apple menu and select “About This Mac.”
- The Memory tab shows total RAM and the number of modules installed.
- If it shows fewer modules than you installed, or less memory than expected, reseat the RAM and restart.
Reset the SMC (System Management Controller)
If a Mac isn’t detecting new RAM after reseating, resetting the SMC sometimes helps:
- Intel Mac (pre-2021): Shut down, press Shift+Control+Option (all on the left side) + Power. Hold for 10 seconds, then release and restart.
- Apple Silicon Mac (M1/M2): Simply shut down and restart. SMC resets automatically.
Compatibility Notes for MacBooks
Not all MacBooks support RAM upgrades. Most pre-2016 models allow DIY RAM replacement, but newer MacBooks have soldered RAM that can’t be upgraded. Check your model on Apple’s support site before purchasing RAM.
Additionally, Mac RAM must meet strict specifications (speed, latency, and voltage). Don’t mix different brands or speeds — use identical modules.
Step 8: When the RAM Is Actually Faulty
After following all the steps above, if the module still isn’t detected in any slot, on any laptop, the RAM is likely defective.
Signs of Faulty RAM
- BIOS doesn’t detect it in any slot.
- MemTest86 reports errors during testing.
- It works in one slot but not another (indicating a slot failure, not RAM failure).
- The system crashes randomly or shows blue screens only when this module is installed.
What to Do
- Check the warranty — Most RAM comes with a lifetime or 10-year warranty.
- Contact the manufacturer — Kingston, Corsair, Samsung, and others provide easy RMA (return/replacement) processes.
- Request a replacement — You’ll typically send the module back and receive a new one within 2–3 weeks.
Don’t throw away faulty RAM — return it through the manufacturer’s warranty program.
Frequently Asked Questions
Does RAM have to be from the same brand as my laptop?
No. RAM is RAM. You can install Kingston RAM in a Dell laptop, Corsair RAM in an ASUS, and so on. As long as it’s the correct type (DDR4/DDR5), speed range, and capacity, it will work. Mixing brands is perfectly fine.
Can I install RAM upside down?
No, it’s physically impossible. The notch in the RAM module aligns with a raised ridge in the slot — it can only be inserted one way. If it’s not sliding in smoothly, you’ve got it oriented incorrectly.
Does the order of RAM matter in dual-channel mode?
Not typically — most laptops auto-detect which slot is which. However, some older systems work better with the old module in Slot 1 and the new module in Slot 2. If you’re having issues, try both configurations.
What if my laptop won’t boot with new RAM installed?
This usually means the module isn’t fully seated or there’s a compatibility issue. See our guide on Laptop Won’t Boot After RAM Upgrade for step-by-step recovery instructions.
Is my laptop doing anything wrong if it’s running RAM at a slower speed than rated?
No. If you installed 3600MHz RAM but BIOS is running it at 3200MHz, your system is simply running at the maximum speed it supports. This won’t damage anything. For gaming or heavy workloads, you can enable XMP/DOCP in BIOS to run at the rated speed (if your system supports it).
Should I enable XMP or DOCP?
XMP (Intel) and DOCP (AMD) are overclocking profiles that let faster RAM run at its rated speed. For most users, enabling it is safe and provides a small performance boost. However, if your system becomes unstable, disable it and stick with default settings.
What’s the difference between SODIMM and DIMM RAM?
SODIMM (Small Outline DIMM) is used in laptops. DIMM (standard DIMM) is used in desktops. They’re not interchangeable — make sure you buy SODIMM for your laptop.
Recommended RAM & Testing Products
| Product | Why We Recommend It | Amazon UK |
| Kingston FURY DDR4 16GB | Reliable, widely compatible DDR4 RAM. Kingston is the world’s largest RAM manufacturer and offers a lifetime warranty. Available in multiple speeds for any laptop. | View on Amazon UK |
| Corsair VENGEANCE DDR4 16GB | High-performance DDR4 with excellent compatibility. Corsair RAM is known for reliability and comes with a lifetime warranty. Great for gaming laptops. | View on Amazon UK |
| Samsung DDR5 16GB | Best choice for modern laptops. Samsung DDR5 offers excellent performance and reliability for new systems supporting DDR5. Future-proof upgrade. | View on Amazon UK |
| Crucial Ballistix DDR4 8GB | Affordable, reliable entry-level DDR4 RAM. Crucial (owned by Micron) is a trusted name, and this is excellent value for budget upgrades. | View on Amazon UK |
| MemTest86 Pro USB | Essential diagnostic tool for testing RAM reliability. Run comprehensive tests to confirm whether new RAM is faulty or if your existing RAM has degraded. | View on Amazon UK |
| Anti-Static Wrist Strap | Protect your RAM and motherboard from electrostatic discharge (ESD) damage during installation. Essential safety tool for any upgrade. | View on Amazon UK |
| Precision Screwdriver Set | Most laptops use tiny Phillips and Torx screws. A magnetic precision set makes opening your laptop far easier and safer. | View on Amazon UK |
| Compressed Air Duster | While you have your laptop open, clean out dust that can trap heat. Better cooling means your new RAM will run cooler and more reliably. | View on Amazon UK |
| USB-to-SATA Adapter | Test old RAM or storage without needing to open your laptop. Also useful for data recovery if a drive isn’t showing up internally. | View on Amazon UK |
| Spudger Toolkit | Plastic spudgers safely pry open laptop cases and disconnect ribbon cables without damaging them. Much safer than metal screwdrivers. | View on Amazon UK |
Prices and availability may vary. As an Amazon Associate, we earn from qualifying purchases.
Related Guides & Next Steps
- Laptop RAM Compatibility Guide — Check DDR4 vs DDR5 support, speed limits, and maximum capacity for your laptop model.
- Laptop Upgrade Troubleshooting Guide — Comprehensive troubleshooting for all upgrade issues (RAM, SSD, boot failures).
- Laptop Won’t Boot After RAM Upgrade — Step-by-step recovery from blank screens and beep codes.
- Laptop SSD Compatibility Guide — Ensure you’re buying the right NVMe or SATA SSD for your model.
/computercompatibility.com/laptop-upgrade-troubleshooting/”>Laptop Upgrade Troubleshooting Guide — Comprehensive guide covering all common upgrade problems.
Key Takeaway
“RAM not recognised” is one of the most solvable laptop upgrade problems. In the vast majority of cases, it’s simply a seating issue or BIOS configuration problem. Follow the steps in this guide systematically, and you’ll identify the problem within 20 minutes. If you’ve checked everything and the RAM still isn’t detected, it’s likely faulty — contact the manufacturer for a warranty replacement.
Good luck with your upgrade, and don’t hesitate to consult our other guides for additional troubleshooting on SSD installation, boot failures, and compatibility checks.