

Affiliate disclosure: this page contains affiliate links — if you buy through them we may earn a commission at no extra cost to you. As an Amazon Associate we earn from qualifying purchases.
The Dell XPS 15 and XPS 16 are premium ultrabooks, and their SSDs can be upgraded if you need more storage or want a faster drive. Upgrading the SSD on an XPS takes about 20 minutes and gives you a massive performance boost. This guide covers the exact steps for both models.
Unlike some sealed laptops, Dell made the XPS user-serviceable. You’ll need a Torx T5 screwdriver, a new M.2 2280 SSD, and a steady hand. The good news: there’s only one screw holding the back panel, and the SSD slot is in an easy-to-reach location.
What You’ll Need
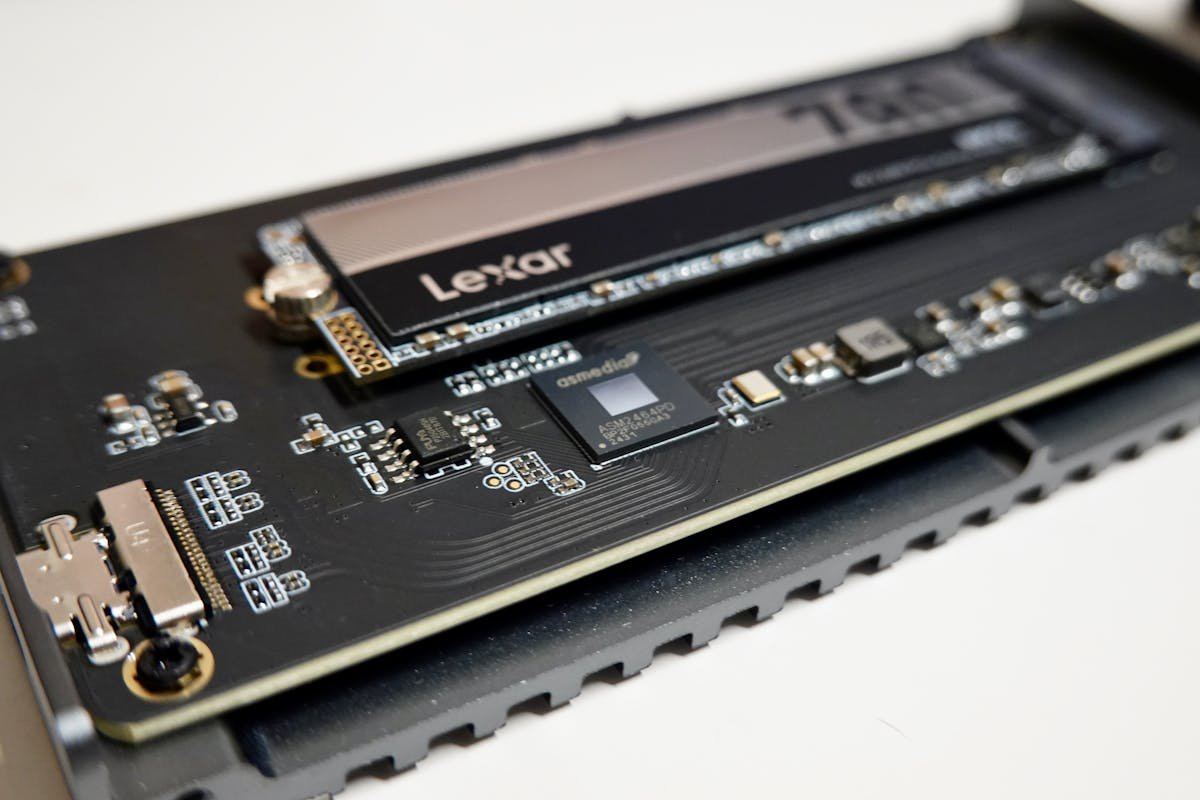
Gather these tools and components before starting. The XPS design is straightforward, but precision matters.
| Item | Purpose | Where to Buy |
|---|---|---|
| Torx T5 Screwdriver | Remove the single back panel screw and SSD screw | Amazon |
| Anti-Static Wristband | Prevent static discharge damaging the SSD | Amazon |
| Samsung 990 EVO or SK Hynix Platinum P41 M.2 2280 SSD | The replacement SSD (1TB or 2TB) | Amazon |
| Thermal Pad (5W/mK) | Thermal interface between SSD and heatsink | Amazon |
| Plastic Spudger | Safely lift the back panel without scratching aluminium | Amazon |
Before You Start
Back up all data to an external drive or cloud storage. You’re replacing the drive where Windows and your files live, so this is critical.
Power off and unplug completely. Wait 2 minutes for all capacitors to discharge. Dell XPS machines have fast SSDs and aggressive cooling — static electricity is a real risk.
Discharge static by wearing your anti-static wristband (grounded to a bare metal part of the chassis) before touching internal components.
Note the thermal pad. Dell includes a thermal pad on the SSD heatsink. When you remove the old drive, the pad may stick to the drive or the heatsink. You’ll need to either reuse it (if in good condition) or replace it with a new one. Most new SSDs come with a pad pre-applied, but check.
Step-by-Step Guide
Step 1: Remove the Bottom Panel
Flip the XPS over and locate the single Torx T5 screw holding the back panel. On XPS 15/16, it’s usually centre-bottom. Use your T5 screwdriver and turn counterclockwise. The screw is not captive, so remove it carefully and set it aside.
The back panel is also held by clips around the edges. Using your plastic spudger, gently lift the edges of the panel — start at the back and work around the sides. The panel will flex slightly; this is normal. You’ll hear small clicks as the clips disengage.
Once the clips release, slide the panel toward you and lift it off. Set it on a soft surface (like your keyboard) so the premium aluminium doesn’t get scratched.
Step 2: Locate the M.2 SSD Slot
With the panel off, you’ll see the motherboard, cooling system, and — right in the middle of the board — the M.2 SSD slot. It’s a rectangular slot about 2 inches long, and you’ll likely see a heatsink covering the current drive. The current SSD is held in at a 30-degree angle by a single Torx T5 screw.
Step 3: Remove the Heatsink
Before removing the SSD, you need to lift the heatsink. There are usually 1–2 Torx T5 screws holding it in place. Remove these carefully. The heatsink will have the thermal pad attached to its underside — be gentle, as this pad has a one-time use lifespan.
Once the screw(s) are out, lift the heatsink straight up. It may stick slightly due to the thermal pad — don’t yank it. Lift gently and steadily.
Step 4: Remove the Old SSD
With the heatsink off, you’ll see the old SSD angled in its slot. Locate the single Torx T5 screw at the far end (opposite the slot). Remove this screw — it’s tiny, so be careful not to drop it.
Gently push the SSD away from you (down the angle), and it will pop up at the opposite end. Grasp it by the edge and pull straight out. The thermal pad may come with the drive — check if it’s still attached or stuck to the heatsink.
Step 5: Inspect and Prepare the Thermal Interface
Check the old thermal pad. If it’s still on the heatsink and looks intact (no dust, no tears), you can reuse it. If it’s on the old drive or damaged, you’ll need to clean the heatsink and apply a fresh pad to the new SSD (or new SSD + heatsink before reinstalling).
Most M.2 SSDs come with a thermal pad pre-applied to the back, so check your new drive. If it has one already, you’re set. If not, apply a new pad to the back of the new SSD, ensuring it covers the area where the heatsink will sit (usually the right half of the drive).
Step 6: Insert the New SSD
Hold the new M.2 SSD at a 30-degree angle (pointing down into the slot, with the connector end lower). Align the notch on the SSD with the key in the slot. Slide it in smoothly until the connector is fully seated.
Once seated, press the far end gently downward and install the Torx T5 screw that holds it at the angled position. Tighten firmly but not hard — you’re securing a thin circuit board, so don’t strip the threads.
Step 7: Reinstall the Heatsink
Carefully position the heatsink back over the SSD. The thermal pad should contact the top surface of the new drive. Lower it gently and ensure it sits flat against the SSD and motherboard.
Reinstall the Torx T5 screw(s) that hold the heatsink in place. Again, firm but not hard — these are into aluminium, and over-torque will strip threads.
Step 8: Reinstall the Bottom Panel
Slide the bottom panel back onto the laptop, starting from the top edge and working it under the clips. You’ll hear the clips snap into place as the panel seats. Once all edges are under the clips, flip the laptop and reinstall the single Torx T5 screw. Tighten it firmly.
Verifying the Upgrade
Power on the XPS. Windows should boot normally. Once at the desktop, verify the new SSD:
Method 1: Disk Management — Right-click the Start button and select Disk Management. Your new SSD should appear as a disk. If it’s unformatted, right-click and Create a Simple Volume to add it to your system.
Method 2: File Explorer — Open File Explorer and look at “This PC”. Your new SSD should appear with its total capacity listed. If it shows as “Unknown” or “Uninitialized”, it needs formatting first (see Method 1).
Method 3: Task Manager — Open Task Manager, go to the Performance tab, and look for Storage. It will list all drives and their capacity.
If the new SSD doesn’t appear anywhere, power off immediately and reseat the drive — it may not be fully connected.
Troubleshooting
SSD not detected in BIOS or Windows — Power off, remove the heatsink, and reseat the drive. Ensure the Torx screw is tight (but not over-tight). Check that the thermal pad isn’t blocking the connector — the pad should be on the top surface of the SSD, not the connector area.
Laptop won’t boot — If Windows was on the old drive, the new one is blank. Use a Windows installation USB to reinstall Windows on the new SSD, or use a backup/clone tool to move your old Windows installation to the new drive before installing it.
Overheating or throttling — This suggests a poor thermal connection. Power off, remove the heatsink, and check the thermal pad. Ensure it’s making full contact with the SSD. If the pad is creased or damaged, replace it.
Partial capacity recognized — New SSDs sometimes appear with lower capacity in Windows. Right-click the drive in Disk Management and check “Properties”. If Windows doesn’t recognize the full size, update the SSD firmware from the manufacturer (download their USB tool).
Recommended Upgrades
For Dell XPS 15/16, stick with reliable, fast NVMe SSDs. The XPS has excellent cooling, so you can use performance-tier drives.
Best All-Round: Samsung 990 EVO (1TB or 2TB) — Fast, reliable, good warranty. £60–120 depending on capacity.
Best Performance: SK Hynix Platinum P41 (1TB or 2TB) — Faster than 990 EVO, excellent in sustained loads. £70–130.
Best Value: WD Black SN850X (1TB or 2TB) — Fast and affordable. £50–110.
For creative professionals using the XPS 15 for video/photo work, 2TB is recommended. For general use, 1TB is fine if you already have cloud storage or external drives.
FAQ
Is my old Windows installation lost when I swap the SSD?
Yes, unless you clone it beforehand. The new SSD is blank. You’ll need to either install Windows fresh or use a cloning tool (like EaseUS Todo Backup) to clone your old drive before opening the laptop. If you didn’t clone, you can still access your old SSD by using a USB-to-M.2 adapter — just plug it into the new Windows installation and copy files off.
Can I use any M.2 SSD, or does it have to be a specific brand?
Any M.2 2280 NVMe SSD will physically fit. However, for best results, use a reputable brand (Samsung, SK Hynix, WD Black, Sabrent) with good reviews. Cheap no-name SSDs may have slow sustained performance or higher failure rates.
Do I need to reapply thermal paste?
No, thermal pads are used, not thermal paste. Ensure the thermal pad on the heatsink (or on the new SSD) makes full contact with the drive surface, and you’re fine.
Will upgrading the SSD void my Dell warranty?
Dell considers the SSD user-replaceable, so no. However, if you damage something else during the process (like the motherboard with static discharge), that’s on you.
How long does the upgrade take?
15–25 minutes if you’re careful. The hardest part is being gentle with the aluminium panel and ensuring the thermal pad is properly seated. Don’t rush.
Can I keep both the old and new SSD?
Only if you use an external M.2 enclosure. The XPS 15/16 has one M.2 slot, so you can’t keep both internally. If you want to keep your old drive, put it in a USB-C M.2 enclosure and use it as external storage.
Recommended Products
These are the products we recommend based on this guide. All links go to Amazon where you can check current prices and availability.
| Product | Why We Recommend It | Amazon |
|---|---|---|
| Corsair Vengeance DDR4 SO-DIMM 32GB (2×16GB) 3200MHz | Best overall DDR4 upgrade kit | View on Amazon |
| Kingston Fury Impact DDR4 SO-DIMM 32GB (2×16GB) 3200MHz | Reliable alternative with tight latency | View on Amazon |
| Crucial DDR4 SO-DIMM 16GB 3200MHz | Budget single-stick upgrade | View on Amazon |
| Samsung DDR4 SO-DIMM 32GB 3200MHz | OEM-quality for business laptops | View on Amazon |
| Samsung 990 Pro 2TB NVMe M.2 2280 | Fastest consumer NVMe — ideal for gaming & editing | View on Amazon |
| WD Black SN850X 2TB NVMe | Excellent Gen4 speed with heatsink option | View on Amazon |
| Crucial P5 Plus 1TB NVMe | Great value Gen4 SSD | View on Amazon |
| Kingston NV2 1TB NVMe | Budget-friendly with solid reliability | View on Amazon |
Prices and availability may vary. As an Amazon Associate, we earn from qualifying purchases.
Related Dell Upgrade Guides
- Dell Battery Replacement: Latitude, XPS & Inspiron Step-by-Step
- Best RAM for Dell Laptops in 2026
- Dell Precision T7920 RAM & SSD Upgrade Guide (2018)
- Dell Precision T7875 RAM & SSD Upgrade Guide (2024)
- Dell Precision T5860 RAM & SSD Upgrade Guide (2024)
- Dell Upgrade Guide
Not sure what fits? Use our free Compatibility Checker covering 3,195+ models.
Helpful Guides
Recommended upgrades
As an Amazon Associate we earn from qualifying purchases. Prices & availability shown on Amazon.
M.2 2280 NVMe SSDs
How we verify this guide
We cross-reference compatibility figures against manufacturer specifications where available, official service manuals, and the standards that govern fit — memory type and speed (DDR4 / DDR5 / LPDDR5), maximum supported capacity and slot count, SSD form factor and interface (M.2 2280, NVMe PCIe vs SATA, keying), and charger wattage and connector (USB-C Power Delivery, GaN). We’re explicit about soldered or non-upgradeable parts, prioritise primary sources over retailer listings, and re-verify the data on a regular cycle. More on our method →

