The Lenovo ThinkCentre M90q is Lenovo’s latest Tiny form factor desktop and the first to support DDR5 memory. With Intel 12th generation processors and cutting-edge DDR5 technology, the M90q delivers impressive performance for a compact system. This guide covers DDR5 RAM and NVMe SSD upgrades specifically for the M90q.
ThinkCentre M90q — Full Specifications
The M90q represents the pinnacle of Lenovo’s Tiny desktop lineup, combining modern architecture with expandability.
Key Specifications
| Specification | M90q |
|---|---|
| Processor | Intel Core i3 / i5 / i7 / i9 (12th Gen Alder Lake) |
| Memory Type | DDR5-4800 MHz SO-DIMM |
| Memory Slots | 2 SODIMM |
| Maximum RAM | 64 GB (2 x 32 GB DDR5-4800) |
| Storage Slot | 1 x M.2 2280 NVMe (PCIe 4.0) |
| Chipset | Intel H770 or B760 |
| Form Factor | Tiny (Ultra-compact) |
| Memory Voltage | 1.1V (DDR5 standard, lower than DDR4’s 1.2V) |
M90q DDR5 Memory Upgrade
Critical: DDR5 vs. DDR4 Compatibility
WARNING: DDR5 and DDR4 are NOT compatible. The M90q uses DDR5 SODIMM only. If you install DDR4 modules, the system will not boot and may cause hardware damage. Always verify you are purchasing DDR5, not DDR4.
| Feature | DDR4-3200 | DDR5-4800 (M90q) |
|---|---|---|
| Notch Position | Notch at position 85 | Notch at position 96 (different) |
| Physical Fit | Will not insert into DDR5 slot | Unique shape prevents misinstallation |
| Voltage | 1.2V | 1.1V (lower power) |
| Speed | Up to 3200 MHz | Up to 4800 MHz (50% faster) |
M90q Stock Configurations
| Configuration | Slot 1 | Slot 2 | Total | Typical Use Case |
|---|---|---|---|---|
| Base Entry-Level | 8 GB | 8 GB | 16 GB | Standard office work |
| Professional | 16 GB | 16 GB | 32 GB | Development, data analysis |
| Workstation | 32 GB | 32 GB | 64 GB | Virtualization, 3D rendering |
M90q RAM Upgrade Paths
| Current RAM | Recommended Upgrade | Final Capacity | Performance Gain | Cost Factor |
|---|---|---|---|---|
| 16 GB (2x8GB) | Replace with 2x16GB | 32 GB | Moderate | Moderate |
| 16 GB (2x8GB) | Replace with 2x32GB | 64 GB | Major | High |
| 32 GB (2x16GB) | Replace with 2x32GB | 64 GB | Significant | Moderate |
| 64 GB (2x32GB) | No upgrade available | 64 GB (maximum) | N/A | N/A |
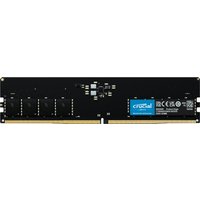
DDR5-4800 Exact Specifications
Memory Type: DDR5 Unbuffered (non-ECC) SO-DIMM
Speed: 4800 MHz (PC5-38400)
Voltage: 1.1V (standard DDR5)
Latency: CAS Latency 40 (CL40) typical
Form Factor: 260-pin SO-DIMM
Important Notes: Faster DDR5 modules (e.g., DDR5-5600 or DDR5-6000) will automatically downclock to 4800 MHz on the M90q. Avoid premium “overclocked” DDR5 modules—standard DDR5-4800 offers the best value.
M90q DDR5 Installation Steps
- Power off the M90q completely and unplug from the wall outlet. Wait 30 seconds for residual power to drain.
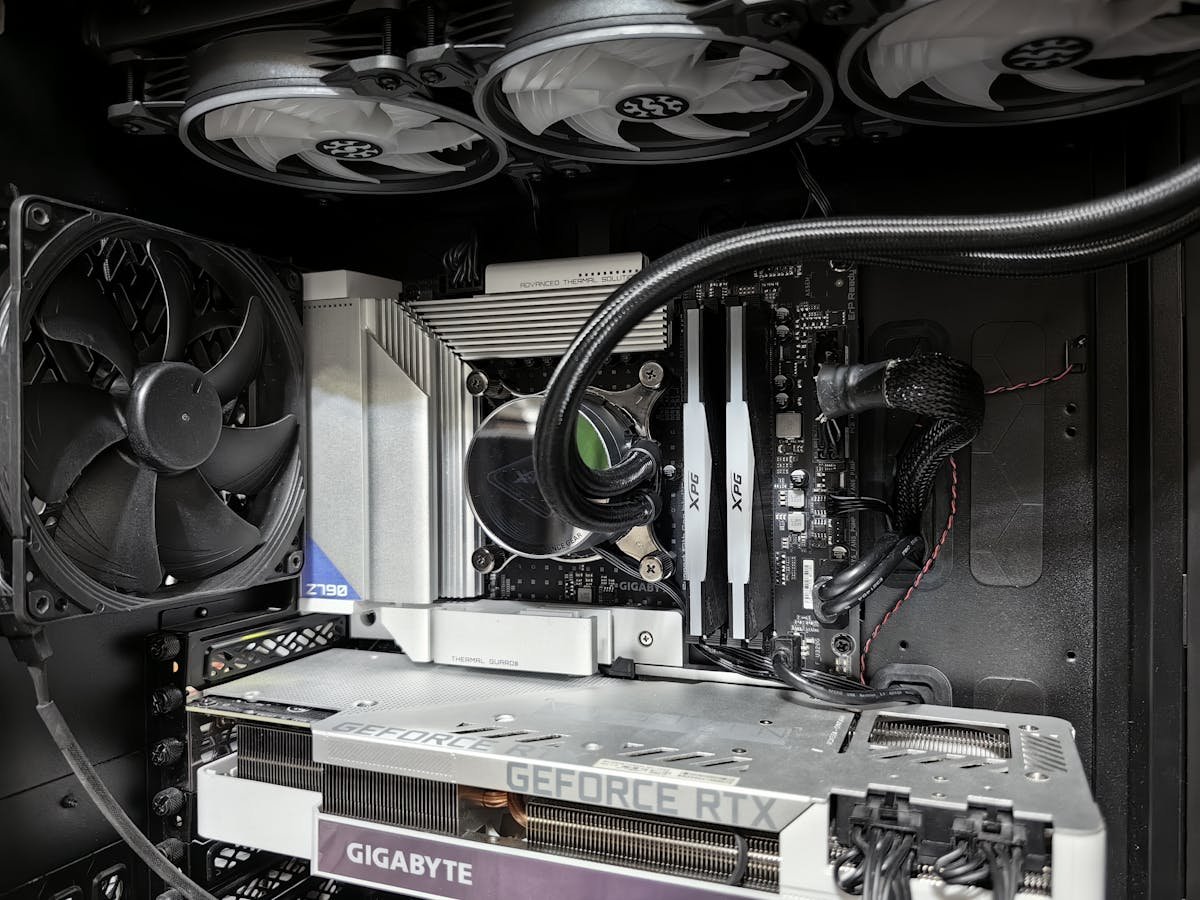
- The M90q’s SODIMM slots are located on the underside of the unit. Carefully flip the unit upside down and locate the bottom access panel.
- Most M90q models have a removable access panel secured by one or two screws. Using a small Phillips screwdriver, remove these screws and carefully lift off the panel.
- You should now see the two DDR5 SODIMM slots. They are larger and have a different notch position than DDR4 slots. Verify the slots are labeled SODIMM1 and SODIMM2.
- Put on an anti-ESD wristband or touch a metal part of the unit to ground yourself. This is especially important with DDR5.
- If upgrading existing RAM, locate the small white retention clips at both ends of the current SODIMM.
- Push both retention clips outward (away from the module) to unlock it. The SODIMM will spring up at a 45-degree angle.
- Gently pull the old SODIMM upward and out of the slot completely. Do not force it—if resistance is felt, ensure both retention clips are fully open.
- Inspect the new DDR5-4800 SO-DIMM. Verify it is DDR5 (not DDR4) by checking the notch position on the module—it should be further to the right than DDR4 modules.
- Hold the new DDR5 SODIMM at a 45-degree angle with the gold connectors pointing downward toward the motherboard.
- Align the notch in the DDR5 module with the key (raised bar) on the motherboard slot. The notch should align perfectly with the key—there is no room for error.
- Gently insert the DDR5 SODIMM into the slot at a 45-degree angle, pushing downward steadily and evenly.
- When fully inserted at a 45-degree angle, press downward firmly on both ends of the module. The white retention clips at both ends should automatically snap shut, securing the SODIMM in place.
- The DDR5 SODIMM should now lie flat (or nearly flat) on the motherboard. No gold connectors should be visible.
- Repeat steps 5-13 for the second SODIMM if upgrading both slots.
- Replace the bottom access panel and secure the screw(s). Make sure the panel is fully seated.
- Flip the unit right-side up and reconnect the power cable.
- Power on the M90q and immediately press Delete (or F2) to enter BIOS Setup.
- In BIOS, navigate to the Memory or System Information section to verify both DDR5 SODIMM modules are detected with the correct total capacity (e.g., 64 GB for 2x32GB modules).
- Save and exit BIOS, then let Windows boot normally.
- Once in Windows, right-click “This PC” or “My Computer”, select “Properties”, and verify the total RAM is displayed correctly.
M90q Storage Upgrade — PCIe 4.0 NVMe SSD
The M90q includes a single M.2 2280 NVMe SSD slot with PCIe 4.0 support. This is a major upgrade over the M70q’s PCIe 3.0, offering up to 7,000 MB/s read speeds.
PCIe 4.0 NVMe Specifications
| Specification | Detail |
|---|---|
| Form Factor | M.2 2280 (22mm wide x 80mm long) |
| Interface | NVMe PCIe Gen 4.0 |
| Maximum Read Speed | Up to 7,000 MB/s |
| Maximum Write Speed | Up to 6,000 MB/s |
| Maximum Capacity | 4 TB (practical limit) |
| Power Consumption | Typical 4-6W |
Recommended M90q SSD Upgrades
| Current Capacity | Recommended Upgrade | Use Case | Real-World Value |
|---|---|---|---|
| 256 GB | 512 GB PCIe 4.0 | Double storage, moderate budget | Excellent |
| 512 GB | 1 TB PCIe 4.0 | General purpose, creative work | Good |
| 512 GB | 2 TB PCIe 4.0 | Demanding workloads, future-proofing | Moderate |
| 1 TB | 2 TB PCIe 4.0 | Content creation, virtualization | Good |
| 1 TB | 4 TB PCIe 4.0 | Maximum capacity, media library | Moderate |
M90q SSD Installation Steps
- Power off the M90q and unplug from the wall outlet. Wait at least 30 seconds for capacitors to discharge.
- Flip the unit upside down and access the bottom panel using the same method as RAM installation.
- Locate the M.2 2280 NVMe slot on the motherboard. It is a horizontal slot, typically near the SODIMM slots. PCIe 4.0 slots are usually labeled “Key M” on the motherboard.
- If an SSD is already installed, locate the small brass retention screw at the end of the M.2 slot.
- Using a small Phillips screwdriver, carefully remove the retention screw. Place it in a safe location (e.g., small magnetic dish) so it doesn’t get lost.
- Gently pull the existing NVMe SSD out of the slot at a slight angle (approximately 30 degrees). The drive should slide out with minimal resistance.
- Inspect the new NVMe SSD’s gold connectors. Ensure they are clean and undamaged. Do not touch the gold connectors with bare hands.
- Hold the new PCIe 4.0 NVMe SSD at a slight angle (30 degrees) and align the notch on the drive with the key on the M.2 slot.
- Gently insert the SSD into the M.2 slot, pushing downward and inward toward the motherboard. The drive should slide in smoothly without excessive force.
- Once fully inserted and the SSD is lying flat against the motherboard, align the screw hole at the end of the drive with the threaded hole on the motherboard.
- Reinstall the retention screw, tightening it gently but firmly. Hand-tight is sufficient—do not overtighten as this can damage the drive or motherboard.
- Replace the bottom access panel and secure the screw(s).
- Flip the unit right-side up and reconnect the power cable.
- Power on and enter BIOS (Delete or F2) to verify the new NVMe SSD is detected with the correct capacity and PCIe 4.0 speed.
- If you are replacing an old SSD with a new one on a system running Windows, you may need to reinstall Windows or use cloning software (Macrium Reflect, EaseUS Todo Backup) to transfer the old drive’s contents to the new drive.
M90q Performance Benefits — DDR5 and PCIe 4.0 Impact
The M90q’s DDR5 and PCIe 4.0 combination delivers meaningful performance improvements over the earlier M70q:
| Metric | M70q (DDR4-3200 + PCIe 3.0) | M90q (DDR5-4800 + PCIe 4.0) | Improvement |
|---|---|---|---|
| Memory Bandwidth | 25.6 GB/s | 38.4 GB/s | +50% |
| SSD Read Speed | 3,500 MB/s | 7,000 MB/s | +100% (2x) |
| SSD Write Speed | 2,500 MB/s | 6,000 MB/s | +140% (2.4x) |
For general office work, these improvements are noticeable but not revolutionary. For data-intensive tasks (video editing, large file transfers, CAD), the benefits are substantial.
FAQ: ThinkCentre M90q Upgrades
Q: Can I use DDR4 RAM in my M90q?
A: No, absolutely not. DDR4 and DDR5 are physically incompatible. The M90q uses DDR5 SODIMM only. Installing DDR4 will not fit, and attempting to force it could cause permanent hardware damage.
Q: What’s the cost difference between DDR4 and DDR5?
A: As of 2026, DDR5 remains approximately 30-50% more expensive than DDR4. This is a significant factor in choosing between the M70q (DDR4) and M90q (DDR5) for budget-conscious upgrades.
Q: Is the PCIe 4.0 NVMe speed really noticeable in daily use?
A: For general office work and web browsing, probably not. For video editing, large file transfers (10 GB+), or CAD work, the speed difference is very noticeable and translates to faster task completion.
Q: Can I install a faster DDR5 module (e.g., DDR5-5600) in my M90q?
A: Yes, but it will be automatically downclocked to 4800 MHz by the BIOS. You’ll pay extra for the faster module but won’t gain any performance benefit. Stick with DDR5-4800 for best value.
Q: What’s the maximum total RAM for an M90q?
A: 64 GB using two 32 GB DDR5-4800 SODIMM modules. The M90q does not support configurations like 48 GB (24 GB + 32 GB); both slots must contain matching capacities for optimal performance.
Q: Do I need special software to enable DDR5’s full speed on my M90q?
A: No. DDR5 operates at its rated speed automatically. The BIOS handles all speed and voltage settings. You do not need to install drivers or run special software.
Recommended Products
| Product Type | Specification | Purpose | Amazon UK Link |
|---|---|---|---|
| Kingston Fury DDR5 SO-DIMM | 16 GB 4800 | Mid-range RAM upgrade | View on Amazon UK |
| Corsair Vengeance DDR5 SO-DIMM | 32 GB 4800 | Maximum RAM upgrade | View on Amazon UK |
| SK Hynix DDR5 SO-DIMM | 16 GB 4800 | Budget DDR5 upgrade | View on Amazon UK |
| WD Black SN850X | 1 TB PCIe 4.0 | High-performance NVMe | View on Amazon UK |
| Samsung 990 Pro | 2 TB PCIe 4.0 | Premium NVMe upgrade | View on Amazon UK |
Related Lenovo Upgrade Guides
- Lenovo ThinkStation P3 Ultra RAM & SSD Upgrade Guide (2024)
- Lenovo ThinkCentre M70s Gen 5 RAM & SSD Upgrade Guide (2024)
- Lenovo ThinkCentre M80t Gen 4 RAM & SSD Upgrade Guide (2024)
- Lenovo ThinkCentre M70t Gen 5 RAM & SSD Upgrade Guide (2024)
- Lenovo ThinkCentre M90q Gen 5 RAM & SSD Upgrade Guide (2024)
- Lenovo Upgrade Guide
Not sure what fits? Use our free Compatibility Checker covering 3,195+ models.
Helpful Guides
Prices and availability may vary. As an Amazon Associate, we earn from qualifying purchases.
Recommended DDR5 Laptop RAM

Kingston Technology
Kingston Technology ValueRAM memory module 32 GB 1 x 32 GB DDR5 5600 M
£438.58
View Deal